Sunday, May 23, 2010

On the Trail of Petticoat Tails - Shortbread in a Stoneware Mold

As I talked about a couple posts back, I have a petticoat tail mold for my shortbread baking pleasure. I quickly found out that my traditional 1-2-3 recipe was not gonna fly when using this earthenware pan. So some alterations were in order....

Well, 11 batches of Shortbread later, I think I have come up with a stoneware mold recipe that I am happy with; along with a few tricks with the oven temperature to keep the edges from getting too brown. The texture finally seems right. (or at least the way I have always liked my shortbread) Sandy, with a little bit of a chew too it, but still melts in your mouth. Oozing with butter flavor, lightly sweet with just a hint of a saltiness.

The perfect accompaniment to a cup of Darjeeling or Earl Grey.

Shortbread Petticoat Tails

78 g Cultured European Butter (It's usually Unsalted)
45 g Super Fine Sugar
3/4 tsp Celtic Grey Salt (Kosher Salt will work just fine)
140 g AP Flour

Preheat oven to 325 degrees.

Beat the butter until creamy and smooth.

Add Super Fine Sugar and Salt....

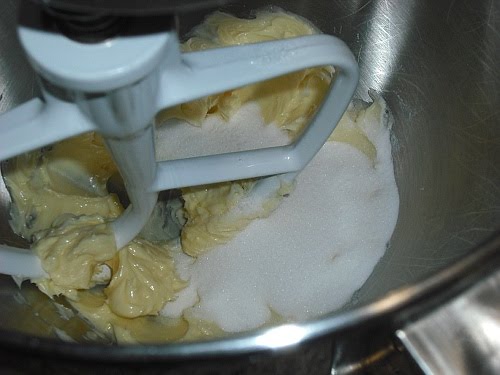
Then beat again until light (not fluffy - If you aerate it too much it will try to rise in the oven).

Remove bowl from the mixer and work in the flour with a fork or a spatula.

You want to mix the flour until you achieve a cornmeal like texture.....

That will just barely hold together when squeezed.

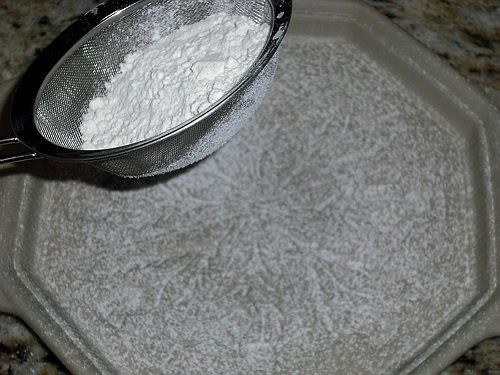
Sprinkle the mold with a thin layer of AP Flour.

Pour the crumbly dough into the mold

and press it in, starting at the middle.... and working your way our to the edge,

making sure it's all nice and even in thickness. (it took me a couple times to get this right)

Prick the backside with a fork to allow steam to escape. (there won't be as much if you used the European butter, since it contains less water)

Bake for 5 minutes; then reduce the heat to 275 and continue baking for an additional 30 minutes. (this heats up the stone to get good color, but doesn't allow the butter to over-brown at the edges)
Remove from the oven and let it set for 10 minutes.

Then work around the edge with an offset spatula, just to make sure the sides didn't stick.

Flip the mold over and release the shortbread round.

Slice with a VERY long knife into wedges and let cool completely. (the texture changes dramatically as it cools)

Enjoy with a nice cup of tea, or coffee.

Or simply by itself.... YUM!!!


Mangia!!
~~

P.S. For the curious.... Teacup by Duchess Bone China "Thistle" Pattern; side plate by Paragon Bone China, no pattern name that I am aware of.

Saturday, May 22, 2010

Power of the Powder - Smokin' Chili Powder

Sorry I have not been around since my Sapote post. It didn't poison me or anything. ;) I have just been REALLY busy this last week.

I was watching my Niece and Nephew Friday and Saturday last weekend while my little brother celebrated his wedding anniversary at the beach and then I assisted my Mother at her table in the Antique show on Sunday. Then this last week I have been a little swamped with attempting to get everything ready for the annual Snake River fishing trip that I am finally able to attend after 20 years.

Needless to say, I am pretty darned excited about the Crappie and Trout fishing. The Catfishin will be fun too, but I LOVE Crappie and Trout.

It is tradition that everyone pick a night and cook dinner for everyone. SO, I volunteered to make Chili and Hush Puppies one of the 5 nights we will be there.

My chosen recipe is one I picked up from one of my BakeSpace friends, Spryte. It is for Hector's Chili. I have made it before and it completely rocks. But I am not really blogging about it per se. Mainly because I am going to be at the Snake River cooking over a propane stove and not able to blog about it at that point. But what I AM going to blog about is my secret (though not now) Chili Powder mix. Yep, that's right -- Chili Powder mix.

And when I say Chili Powder mix, I mean powdered chilies all mixed together. No Garlic, Oregano, Cumin or stuff like that (That gets added separately). The advantage to making your own, is that you have complete control; not only of how hot your powder is, but how much smoke, fruitiness or earthiness your chili will have. For instance, Ancho chilies have a mellow heat with more fruit,

while the New Mexico chilies are earthy and significantly warmer.

Then there is my most favoritest chili of all..... The Chipotle. Oh yeah baby! Nice and smoky with a seductively alluring heat. mmmmmmm

Then for those that like a milder chili you can always use more Sweet Paprika,

or for a sweet smoky flavor, use Smoked Paprika.

Wanna blast your taste buds away? Add Habanero or Serrano.

The options are infinite.

This is my Smoky Chili Powder mix. It has heat, but I think it's still on the mellow side. Slightly fruity with earthy hints and all that luscious smokiness to back it up. And I do cheat. I am not roasting my own chilies of anything like that. I simply buy my ingredients pre-ground and mix them up. I always have small amounts of everything left over so I can alter my own mixture if I want to, when adding it to the pot. :)

Schmokin' Chili Powder

42 g Powdered Chipotle
40 g Ancho Powder
32 g Sweet Spanish Paprika Powder
25 g New Mexico Powder
15 g Smoked Paprika Powder
1 g Cayenne Pepper

Simply weigh everything out into a bowl or glass pitcher.

Stir with a fork until well combined, breaking up any lumps.

Place in an air-tight container with a label and store until needed.


Mangia!!
~~

Wednesday, May 19, 2010

Happy, Happy; Joy, Joy!! - Petticoat Tail Shorbread Mold

Woo HOO!

Have I ever mentioned how much I love eBay? Well, I do. For I have finally, after so many years, been able to procure a Petticoat Tail Shortbread Mold for a reasonable price. Even after having to pay shipping.

Lemme tell ya... 1.99 plus 8.00 shipping is a lot easier on the budget than 35.00 and 10.45 shipping directly from Brown Bag or Hartstone.

I am very excited. So there will be plenty of new Shortbread recipes coming up forth with. Though I am going to have to modify my current 1-2-3 recipe, cause it doesn't seem to work in the mold. I tried it, and it turns out WAY too brown on the edges, and it still tastes floury... So I am altering a few ratios to see what I can come up with.

In the meantime. Let's just talk about mold preparation.

Wash the mold in warm water before first use - I do not recommend soap as the stoneware appears to be similar to the Pampered Chef stuff and soap is a major no-no on this particular type of material.

Apply a thin layer of cooking Spray - I am using Spray olive oil.

Then gently sift either AP flour or White Rice Flour over the surface.

Now it is ready to have dough pressed into it.

The Beauty of Shortbread, is that you will never have to spray it with oil again. That is, as long as your using it for Shortbread, for the butter content is so high that your mold will, afters the initial oiling, stay lubed up for eternity. When you go to bake another batch, simply sprinkle it with more flour and voila!

Complete and Total Cookie Awesomeness is only "25 minutes at 300 degrees" away!

Mangia!!
~~

Saturday, May 15, 2010

Suffering Saponin - Mamey Sapote

They say curiosity killed the cat. Or at least left a bad taste in his mouth.

I am all for new food experiences. I guess I have to come to terms with the fact that I may not "like" everything I try. Meet the Mamey Sapote.

Related to several other types of Sapote, such as Green and Yellow, but not to the Sapodillo or the Black Sapote. Kind of confusing huh?

It's not normally found this far north (Oregon) though I don't remember seeing it in Southern California either. It is native to southern Mexico and equatorial South America. But I found one at New Seasons Market and decided to try it. Regardless of the warnings from the produce guy... Evidently I enjoy living on the edge. I figure the Earth is round, so I can't fall off.

This is what it looks like after cutting it open... Kind of looks like a pointy orange Avocado, if your ask me.

Though the single seed is protected by a much thicker and harder shell.

I peeled it.... It really is an attractive salmony cantelop-ish type color. And it smelled really good.

So before I even tasted it, I had decided that I would try to make Ice Cream with it. I do that a lot when I don't really know what to do with mysterious fruits. So I cubed it up and was ready to puree it.

THEN I tasted it. Nice and sweet, almost like a dry cantaloupe flavor, a little caramelly, in a sweet potato kind of way.... But then.... I got hit with something very tannic, like the dryest red wine you can think of. It was a little strange, and while I enjoy tannin in wines, I don't so much enjoy it when I am eating fruit. My mouth was SO dry that I had to bite down on a lemon just to get my saliva to flow again.... Very Strange.

Maybe it was still not ripe. I don't know.

All in all, not my favorite fruit... At least not at this point. I am going to try one more just to make SURE that I don't like it. After I think it is ripe of course. :)

Mangia!!
~~

Tuesday, May 11, 2010

Fungus Among Us - Risotto alla Funghi Porcini

It's that time again..... Risotto!

I came home empty handed after hunting the elusive morel in the higher elevations around Mt. Hood, now that the snow is beginning to melt. Though I did find out, after traipsing around the side of the mountain, that I am still a bit of a "mountain goat" even at 41. Which is encouraging considering my lack of exercise over the last 7 months. I can still jump from fallen log to fallen log without loosing my balance and falling on my keester. Whew!

Sadly though, I had already whet my appetite for a morel risotto. Luckily I still had a package of dried Porcini (King Bolete) in the cupboard, so though I was denied the succulence of the Morel I was still able to indulge in the deliciousness of that Porcini have to offer. (I would go and hunt these in the Coastal Range, but I have no idea where to even begin)

This is really a quick run-down of the risotto making process, for a more in depth look at risotto do's and dont's or Black vs. White Truffles, please check out one of my previous posts - Identity Theft or The Mystic White Truffle

Risotto alla Funghi Porcini

(or Risotto alla Bolete)

4 cups Mushroom Stock
1 oz dried Porcini or 1/2 lb fresh Porcini (Boletus Edulus or the King Bolete)
1 cup Hot Water
2 Tb Olive oil
2 TB unsalted Butter
1 Shallot, minced
1 1/2 cups Arborio Rice
1/2 cup Dry White Wine, room temperature (Chardonnay)
optional - 1 tsp Porcini Powder
Kosher Salt & Freshly Ground Black Pepper
3 TB Parmigiano-Reggiano (or Pecorino Romano, depending on your preference)
1 1/2 TB unsalted Butter
optional - 1 tsp White Truffle oil (Mine is REALLY strong - You may need as much as 1 TB depending on the brand)

Place the dried Porcini in a small bowl and add enough hot water to cover (about 1 cup); then allow them to soak for 20-30 minutes.

Begin heating your Mushroom stock over low heat.

When the mushrooms are hydrated, squeeze out the excess water.

Dice them fairly finely. (reconstituted porcini don't really shrink when sauteed)

Strain the left over liquid through cheese cloth into the hot mushroom stock.

Melt butter and olive oil in a saute pan.

Add the Shallot and saute until translucent.

Add the diced Porcini and cook about 1 minute longer.

Add the rice and saute for 2 minutes, or until the begins to smell a little nutty.

Pour in the White Wine and stir, allowing the rice to absorb the liquid.

Begin adding stock 1 ladle at a time, stirring until each addition of liquid has been absorbed before adding the next (this will take about 15-18 minutes) and you may not use all the stock.

After your have added 2 ladles full of stock, go ahead and add the porcini powder as well.

When the rice is al dente (or still a little firm in the center) remove from the heat and stir in the butter and Parmigiano-Reggiano.

Cover and let it sit for 3 minutes.

Just before serving, season with Salt and Pepper along with in 1 tsp of the White Truffle oil. (white truffle oil degrades quickly if subjected to high heat, so it is best to use it at the end after the risotto has cooled slightly - If you choose to use black truffle oil, you can add it about 1/2 way through the cooking process as the heat will "bloom" the flavor in the black truffle)

Dish and serve while still hot.

Mangia!!
~~