Wednesday, June 30, 2010

Oh, Oh, Oh, it's Magic.... Ya Know - Magic Melting Marshmallow Muffins

There are moments in time, when, even though you KNOW it's bad for you, you simply crave something from your childhood and nothing else will do. You absolutely have to have it. You obsess about it. You make yourself crazy, dreaming about it.

Thus it is with these little parcels of marshmallowy goodness that my mom use to make when wer were wee little ones.

Magic Melting Marshmallow Muffins

2 Tubes Pillsbury Crescent rolls (It needs to be Pillsbury, the off brands don't work right)
6 TB Unsalted Butter, melted
1/4 cup Granulated Sugar
3/4 tsp Cinnamon
16 Campfire Marshmallows (Jet-Puffed expand too much)

Place the melted butter in a bowl or Pyrex Pitcher.

Mix the Sugar and Cinnamon, kind of like you would do if making Snickerdoodles.

Set up your "Dredge" station.

Unroll your crescent roll dough onto a lightly floured surface.

Dip a Marshmallow in the melted butter.

Then roll in the cinnamon sugar.

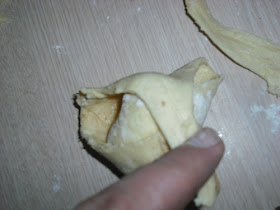
Wrap the Marshmallow in the Crescent roll dough,

pinching it closed to completely encase the marshmallow.

Dip the Whole thing in the melted butter.

Place in a regular sized muffin cup.

Bake for 10 minutes. (Don't despair, no matter what you do, a couple of them will explode)

Try to wait until they cool, though I cannot and I always burn myself.

Look ma! No marshmallow!

Mangia!!
~~

Saturday, June 26, 2010

Meeska... Mooska.... Mickey Mouse! - The Mickey Mouse Club House

OK, I think I have kept you all on pins and needles long enough.... Especially since my nephew's 2nd Birthday party was today. So it's OK for me to let the proverbial "mouse" out of the bag.

All those Rice Krispie treat bits and baubles were the pieces necessary to construct... Well, I will let the picture speak for itself.

Welcome to the Mickey Mouse Club House!

Originally, we were going to make the whole thing out of cake, but we decided that the head part would be just a little bit too unstable. So I suggested Rice Krispie treats for the ears.... After mulling it over several times, we decided to just use a simple sheet cake base, turn it into Mickey's Front yard and make the club house as an edible cake topper. I think it worked out pretty well....

Though the Rice Krispie Treats were a little on the bumpy side; so I made some crusting butter cream. (I probably should have just left well enough alone, I think I just made more work for myself than was needed - I was "over thinking" it)

Frosted all the pieces and let them dry.

Then smoothed them out with a paper towel.

Then I made a ton of Marshmallow Fondant. (DD! You Totally Rock!)

Divided it and colored it Blue, Yellow, Red and, even though I missed photographing it, Black... I also left some of it white for Mickey's glove.

I also made gumpaste window and door frames as well as a gumpaste slide (though when traveling, the foot fell over and broke the slide) Grrrrrrr.

My big goof-up was that it was all a little too big for the cake....

so Mickey's hand had to be set behind the cake, on the table instead of being ON the cake where it belonged. It was the leg and the foot that were the problem, I made the leg about and inch too long and the foot should have been about 3/4 of the height I made it. Oops!

My brother Chris, Marshall's dad, added all the finishing touches.... graham cracker sand, green coconut grass and some stepping stones, to complete the look.

Marshall, was VERY excited about his birthday cake.

Then the excitement ebbed and he was ready to eat it. LOL


Mangia!!
~~

Thursday, June 24, 2010

Krispie Conundrum - Rice Krispie Teaser.....

So my littlest nephew is about to celebrate his 2nd birthday and I have been assigned the task of creating an edible cake topper. I am not going to give any more clues now.

This is just a teaser preview... Cause I still have a lot of work to do. LOL

My edible "Styrofoam" pieces have been completed......

Lots and LOTS of Rice Krispie Treats....

All formed by hand with the help of Nitrile Gloves.

Things I have learned from this little adventure.......

Cocoa Rice Krispies have a chocolate coating on the outside, that, while great for turning your milk chocolatey, does not foster ease of Krispie treat construction... They get REALLY sticky, clingy and gooey. I won't be using them again any time soon. At least not in this kind of endeavor.

Tune in for the next installment -----> Fondant Coverage and Final Construction.

I love Birthdays!!!

Stay Hungry
~~

Tuesday, June 22, 2010

Pasta Striptease - Ravioli Gnudi al Forno

Well, I am finally on the mend from my bout with strep throat. I suppose I should have known that I would eventually catch it after switching climates. But I thought I was gonna get lucky this year, since it's almost JULY. I was wrong. This has put a damper on my cooking as well as my ability to sit and write a post. ;) But my fever has broken and I am feeling a much better.

SO lets get naked!!! - Naked Ravioli that is. (keep it clean people - This is a family blog after all) ;)

Basically, all Ravioli Gnudi is, is ravioli filling, sans pasta wrapper. The addition of a little flour will to hold it together so it can be boiled without falling apart and turning into soup. This particular recipe is very similar to a Ricotta Gnocchi. This is a great alternative for anyone on a pasta free diet. (though I find it hard to imagine life without pasta) LOL

The "al Forno" part? Well, after I boil them, I like to toss them with melted butter, place them in a gratin pan, sprinkle them with more cheese and bake them for about 15 minutes at 300 degrees... YUM.

Ravioli Gnudi al Forno

24 oz (675 g) Fresh Spinach (though Swiss Chard is nice too)
8.8 oz (250 g) Ricotta Cheese
4.6 oz (130 g) AP Flour
3 large Egg Yolks
5 oz (150 g) Freshly Grated Parmigiano-Reggiano, plus a little more for topping
1/2 tsp Nutmeg
1 Shallot, finely minced
4 oz (227 g) Unsalted Butter; divided
Kosher Salt

Wash the Spinach and drain the spinach, but do not spin it dry.

Place it in a large pot, with the water still clinging to the leaves.

Add a little salt....

Cover and place over medium heat, cooking for 15 minutes.

Drain and let cool enough to touch it.

Squeeze out as much water as possible.

Then chop it finely.

Melt 2 oz butter in a sauce pan.

Add minced shallot and saute for about 2 minutes.

Add the spinach and a pinch of salt, cooking for an additional 5 minutes.

Set aside to cool.

Mix AP Flour, Ricotta and Egg yolks in a medium bowl.

Stir until you have a soft dough (Just like making gnocchi)

Add Nutmeg and a pinch of Kosher Salt.

Add the spinach and stir to combine.

Finally, stir in the Parmigiano-Reggiano.

Cover with plastic wrap and chill for about 1 hour (this will make it easier to handle)

Lay a large piece of Wax paper on the counter and remove the Ravioli filling from the refrigerator.
Spoon out about 3/4 tsp of the filling.....

and "roll" it into a small oval "pellet".

Continue until all the filling has been used. (It seriously helps if you have someone to assist)

Bring a large pot of water to a boil and preheat the oven to 300 degrees.

Melt 2 oz (4 TB) of butter in a small sauce pan.

Boil Ravioli Gnudi, in batches, for about 3 minutes...

or until they float.

Remove with a strainer.

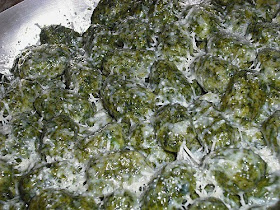
Toss with the melted butter and lay out in a gratin pan.

Continue until all the Ravioli Gnudi are cooked and tossed with butter.

Sprinkle a small amount of Parmigiano-Reggiano over the top.

Bake in the oven for about 15 minutes. (Until the cheese melts)

Serve while still hot.

Mangia!!
~~