Showing posts with label Beer. Show all posts

Monday, September 24, 2012

Hopped Up Potatoes, Literally - Hop Fries

I think it's safe to say that Oregon has a fairly rich and diverse beer drinking culture.  But then again, Oregon has A LOT of breweries....  121 as a matter of fact (according to a 2010 report by the American Brewer's Association)  Hilariously enough even though this boils down to 1 brewery for every 31,600 people, Oregon is only number 2 in the list.  Rounding out the top 5 are Montana at #3 (Love me some Moose Drool from Big Sky in my Chili), Colorado at #4 (which surprises me since the Brew College is there), and Maine at #5.  So who is number one?  It's Vermont that boasts the highest amount of breweries per capita.  Of course, you must realize that the entire population of the Vermont is about 625,000 people.  With 21 breweries, that means there is 1 brewery for every 29,800 people (roughly).   This also means that Oregon is giving Vermont a run for it's money at being the brew capital of the US.   If you figure in Washington and it's additional 123 breweries (Washington is #8 on the list), that the Great NorthWet, as we so lovingly refer to it, is the land of Beer and Beans (Coffee Beans, that is).

All through my childhood and well into my adult years, the Henry Weinhard's Brewery in NW Portland has been pumping out Boar's Head Red, Henry's Dark Lager, Henry's Ale and of course, Henry Weinhard's Private Reserve.  Sadly, the original brewery closed, but all was not lost... For countless (OK, there are 121) "Micro Brewers" have taken the place of Portland's longest running brewery.  Enter the world of craft brewing and you will find.... Widmer Brother's, Coalition, Laurelwood, Bridgeport, Ft. George, Boneyard, Dechutes, Lompoc, Ninkasi, Rogue, Upright, Alameda, Hair of the Dog, Amnesia, Bend Brewing, Double Mountain, Cascade Lakes, Hopworks, and Full Sail (which brews not only their own varieties, but Session and Henry Weinhard's since the closing of the Portland brewery).

With easy access to so many difference styles of beer, a strange phenomenon has formed.  Sort of a sub-culture within the craft brewing culture.... The Hop Head.  I suppose it was inevitable since several varieties were developed here at Oregon State University, such as Cascade, Willamette, Liberty, Santiam and Mt. Hood.  Yes, things are really hoppin at OSU...  hardee har har

Hops, Hops and more Hops....  Don't get me wrong, I like Hops in my beer.  The Alpha acids help to preserve it, and that makes me extremely happy, but there is a surge in the crafting of Ales to please the Hop Heads... Thus IPA (India Pale Ale) which tends to be fairly hoppy already, since it had to travel from England all the way to India and was in desperate need of the preserving power of hops, has given way to the style known as NWPA (NorthWest Pale Ale).  These NWPAs are usually extremely hopped versions of IPA and as a result, are REALLY bitter.  This is the drawback to preserving the beer with alpha acids, the bitterness they create.  The more bitter the beer, the longer it will last.

This actually brings me to the topic of Hops themselves, for they are the essence of beer all rolled into a small green flower bud.  Hops are responsible for preservation, flavor and aroma in beer.  Most beers contain at least 2 different hops, for those that preserve and/or add flavor do not necessarily scent the beer as well.    My favorite aroma hop is Saaz but it does not contain enough alpha acids to preserve or bitter the beer.  One must turn to the higher Alpha content in Centennial, Magnum or really kick it up and go with Chinook to properly preserve/bitter the beer.

But enough about Hops as they pertain to beer.  This post is actually about other things you can do with hops.  Yes, you can eat them as well, just like any other herb.  I would suggest consuming the lower Alpha hops such as the afore mentioned Saaz or maybe Hallertauer or Tettnanger.

One of my favorite hopped up dishes is very easy to make.  I was first exposed to the concept during the 2011 Fruit Beer Festival held at Burnside Brewing.... Hop Fries!

Hop Fries

Frozen Shoestring fries (I avoid making fries from scratch, it requires a double frying... too much work)
Oil for Deep Frying
2 hop flowers, finely minced (a little goes a long way)
Kosher Salt (or Smoked Salt)

Prepare a pan by laying down paper towels and place a cooling rack over them.

Heat the oil to 375 F degrees.

Drop the shoestrings and fry according to package directions.

Finely mince the hop flowers.

Remove the fries from the hot oil and drain on a rack.

Season the fries with Kosher Salt. (though I chose Salish Alder Smoked Salt this time)

Sprinkle the finely minced hops over the fries...

Toss briefly and serve hot.

Super easy and super delicious!

Time to think outside the beer bottle.

Mangia!!
~~

Sunday, November 21, 2010

Well I'll Be a Monkey's Dunkel - Let's Get Crackin'

Well, It's finally that time..... I think everyone has waited long enough for the final update...  :)

Time to crack open a much awaited home brew.  Yep, 15 days after bottling it's time to finally take a taste.

So here is a bottle.

and here is a glass.....

And here is the traditional way of drinking it in the "hefe" style (with yeast) by rolling the bottle on the counter (or bar) to mix it all up.

Then you make a long pour into a glass and admire the beige head...

None of that white foam on this my friends, for this is the the darker side of weizen...

Once it subsides a little, top off the glass.

Tip it back and enjoy.....

I was a little disappointed at how fast the head subsided though, I must not have gotten enough protein in the mash to stabilize the head... Not that there should be so much as to interfere with drinking, but it should be a little more stable than it was....  Also, I was hoping it would be a little darker.  I was fooled by how dark the malt extract was, but I was thrilled with the "hit" of elderberry flavor.... it definitely had the "twang" I was expecting.... Unlike blonde "hefeweizen" there is NO lemon needed on this one... ;)

The recipe is below, in all it's glory, as I originally wrote it... though I have fleshed out the directions a little bit... I originally used a Brewer's Friend Template which is really a collection of labeled tables.  You can give it a shot, if you would like, but I am going to make a couple alterations and give it another shot... But first, I think a little more "tasting" is in order, to ensure my alterations are in the best interest of this brew.

Yep, this is some SERIOUS research...  LOL

I'll Be a Monkey's Dunkel

ElderWeizen (Dunkel)

8 oz Munich Malt
8 oz Wheat Malt

7 lbs 50/50 Barley and Wheat Malt Extract

1 oz Liberty Hops AA rating 5.2 - 60 minute boil (bittering)
1/2 oz Saaz Hops AA rating 5.1 - 15 minute boil (flavor)

Additions:
1 1/2 cups Elderberry Juice

Yeast - White Labs - WLP 300 (German Weizen Yeast)  pitch @ 75 degrees

OG 1.059
EG 1.013

Heat 1 Quarts water to 130 degrees.
Add grains in mash bag and hold temperature at 120 for 15 minutes. (Protein Rest)
Meanwhile in a separate pot, heat an additional 3 quarts of water to 170 degrees.
When Protein rest is complete, add 2 cups of 170 degree water to bring the temperature up to 150. Apply low heat and hold this temp for 30 minutes for the Beta-Amylase to work.
After 10 minutes, add 2 more cups 170 degree water to raise temp to between 158 & 162.
Hold temp for 15 minutes to allow alpha amylase to work.
Remove grain bag and stretch over secondary brew pot, pour the malty water through the grains.
Pour the remaining 2 quarts of water over the grains as well, to sparge them.
Add an additional 3 gallons of water to the brewing pot.
Begin heating until water reaches 170 degrees.
Slowly stir in the 50/50 Malt syrup  and continue stirring until temp reaches 190 (this will ensure that the syrup doesn't settle on the bottom of the pot and burn)
Bring to a boil and add the Liberty hops (in a hopping bag)
Boil for 45 minutes, then add the Saaz hops (also in a hopping bag).
Boil for an additional 14-15 minutes.
Kill the heat source and remove the hops from the kettle and into the carboy funnel.
Sparge hops with cold water.
Chill brew kettle in an ice bath or by using a wort chiller (your choice)
When the wort reaches 160 degrees, stir in the elderberry juice with a clean spoon.
When the wort reaches 75 degrees, siphon into the carboy, splashing the wort as much as possible to incorporate oxygen.
Add additional water if necessary to fill carboy to the 5 gallon mark.
Take Specific Gravity reading and record.
Pitch yeast and cap the carboy, roll it back and forth on the floor to disperse yeast through the wort.
Connect blow-off tube and let set until Kraeusen....
After Kraeusen (blow-off) replace tube with fermentation lock.
Rack into clean carboy after 1 week, Check Specific Gravity, replace fermentation lock.
When fermentation is complete, record final gravity reading.
Boil 1 pint Water with 1 1/4 cup Wheat malt for 5 minutes.
Siphon beer into fermenting bucket for bottling.
Prime beer with boiled syrup.
Fill bottles and cap.
Let beer age for 2 weeks in bottle, then enjoy with gusto!!!

Cin Cin!!
~~

Monday, November 15, 2010

Well I'll Be a Monkey's Dunkel - The Gravity Of The Situation

Sadly, my Let's Get Crackin' post will be delayed...  One must remember that the process of making beer involves a living creature... Yeast.  Sometimes yeast just takes a little longer than you think it is going too, so you must wait...   I had hoped that the bottle conditioning would only take 7 days... Alas, it seems that it will take 10. 

In the meantime I wanted to talk about WHY the seeming obsession with taking the Specific Gravity.

The Short answer is that, without Gravity readings you have no idea what the alcohol content of your beer is...   Not that it may matter to some, I mean come on, beer is beer, right?  But there are other reasons to monitor the Gravity of your Wort that will assist you in decided when to bottle your effervescent nectar.

When you measure the specific gravity of the wort at the beginning, you are measuring the amount of dissolved substances in the water, mainly malt sugar, dextrins, hop resins and amino proteins.  This changes the density of the water which normally has a specific gravity of 1.000 at 60 degrees F (15.5 C).  Thus, using my own Original Gravity reading of 1.058 means that it is .058 denser than water.   Yeah, that doesn't mean a whole heck of a lot, but it will be necessary later.  Trust me.

The next issue is that I did not measure Specific Gravity at 60 degrees, for the wort would have been too cool for me to pitch my yeast.  I took my reading at 75 degrees, so I need to adjust my reading... For every 10 degrees in temperature need to add .0012 to the Gravity reading.  Since I took mine at 75 degrees I need to add .0018.

1.058 + .0018 = 1.0598
 
I know, it still doesn't really mean anything, at least not until we convert this to degrees Plato... Plato is the measuring unit of the Balling scale.  It allows us to compute the amount of sugars dissolved in every 100 grams of wort as a percentage.  There is a simple calculation for obtaining the degrees Plato.  1 degree of Plato is equal to 4 "brew points".  The brew points I am talking about are the points behind the decimal in your Specific Gravity reading (.0598).  Thus, 1 degree of Plato is equal to (4 x.001).  

.0598 / (4 x .001) =  14.95 degrees Plato

Now you know that every 100 grams of Wort contains 14.95 grams of Sugars (14.95 %).  The reason to do this is if you intend on checking your Malt Extraction and Attenuation calculations, but I am not going to get into those right now.  (you may now breathe a sigh of relief)  LOL

Getting back to Specific Gravity... When racking, you need to measure the specific gravity again.  This is to see if the fermentation is complete.... Most Ales will be finished when the Gravity reaches 1/4 or 1/5 of the original Specific Gravity reading.  Since the Dunkelweizen had an initial reading (Original Gravity or OG) of 1.0598, I was looking for a reading of between 1.014 and 1.011 so I will know that my fermentation is complete.(Expected Gravity or EG)

.0598 / 4 = .014   or   .0598 / 5 = .011

When I racked the Dunkelweizen, the Specific Gravity had only dropped to 1.016 at 70 degrees, thus being 1.0172 (1.016 + .0012 = 1.0172).  I knew the yeast were not finished converting my wort into viable beer and they needed at least another week to finish the job.

Finally, after 1 more week, the beer reached the Expected Gravity of 1.012 at 70 degrees (1.0132) so I knew it was time to bottle.

Now the fun part...   Alcohol has a lower gravity than water, so when you take the subsequent readings, as the number reduces, there is more alcohol in the beer.  When you take your final reading (mine was 1.0132) and compute the difference between the Original (OG) and the Ending (EG) you can calculate alcohol content by weight.

1.0598 - 1.0132 =  .0466 Difference

.0466 X 105  = 4.893% alcohol by Weight

Now since we know that alcohol is lighter than water, we can compute the alcohol by volume as well with a little more multiplication.  1.25 milliliters of alcohol weighs the same as 1 milliliter of water, so our volume content calculation becomes....

4.893 X 1.25 = 6.11% by Volume

I know, I know, I'm talking about brewing beer and suddenly it became a math lesson.  Sorry....

But now you know why taking Specific Gravity readings are crucial.  Not only for computing the alcohol content of your brew, but can assist you in gauging when your beer has completed it's fermentation AND help you compute your ability to extract Malt sugars from Grains.  If you are finding your sugar contents are too low you may need to change your extraction procedures.

Cin Cin!!
~~

Saturday, November 13, 2010

Well I'll Be a Monkey's Dunkel - Primed and Ready.... To Bottle That Is

So we have reached the point where fermentation is pretty much done.  The majority of the yeast has flocculated and settled out, the beer has been siphoned off into a new carboy to continue fermenting with the remaining yeast and the CO2 production has slowed to a crawl.

This scenario means that it is time to bottle the beer.  Granted it would be a lot easier and less time consuming to Keg the beer, but one would need to invest in said keg (cornelius kegs being the easiest to deal with) and a tapping system for said keg and more than likely some form of refrigeration for said keg to keep beer cold.. Blah blah blah blah.....

Bottling is less expensive and though more time consuming, more attainable for most of us.  Granted, you will need bottles and bottle caps as well as a bottle capping device.  This still represents a slight investment, being the caps and a capper, but if you drink beer already then you have a supply of bottles.  Just don't turn them in for the 3 cent refund.  You can remove the labels, and run them through the dishwasher and voila!  Bottles.   Just be sure they are NOT the twist off cap type.

In order to Bottle, or at least the way my brother does it, you will need a "fermentation bucket" or some such container to move the beer to.  Most fermentation buckets have a spigot, it is to this spigot that you will attach the filling hose.  (I know, more equipment)  The bottle filling hose has a special fitting on the end, you insert the hose into the bottle and press the end against the bottom. 

This allows the liquid to flow, as the liquid flows it creates very little agitation and thus incorporates very little or no oxygen into the finished beer (cause at this point, oxygen will just oxidize you beer and make it taste weird.)  When the bottle is full, simply raise the hose off of the bottom of the bottle, and the flow will stop.... Super easy...  and no mess.

BUT before we can begin bottling, you need to get those bottles clean.... Soak them in iodine solution, even if you ran them through the dishwasher.... They MUST be sanitary.  You can dry them by throwing them back in the dishwasher and running them through the dry cycle.

Boil your bottle caps in a small amount of water for at least 5 minutes.

Now you can siphon the beer into the fermenting bucket.....

And attach the sanitized filling hose (you remembered to sanitize this as well right?)

Take your last gravity reading (I sear this is the last one).  The Dunkelweizen reading was 1.013 (I will explain the mathematics in my next post)

Now take a moment, grab a beer glass...  Pour the liquid from the gravity test into it and admire the color of your beer....   It's OK to feel proud of your accomplishment.... Just a little more patience and you can drink it....


Now you are going to have to "prime" the beer before you can bottle it. This adds more sugars back into the beer and allows the the yeast that are still around to produce more CO2 and alcohol.  It's not so much the alcohol that your after time, but CO2. (Unless you like flat beer)  And yeast produces a lot of CO2

In order to Prime the beer for bottling you will need to make a malt syrup (or you can use corn sugar).  I chose Unhopped Wheat Malt as my priming sugar (after all, this is a wheat beer and I had already added hops during the boil)

The generally accepted ratio for the syrup is 1 pint of water and 3/4 cup corn sugar or 1 1/4 cup Malt for a 5 gallon batch of beer.  if you like your beer a little more fizzy I have head you can add up to 1/4 cup additional Malt, I am not sure how much more corn sugar you can add before you beer explodes.

So boil the syrup on the stove and let it cool slightly.

Pour this syrup into the beer,

Then give it a gentle stirring (remember, no bubbles or you get oxygen)

OK, Now you can fill bottles.

Simply slide the bottle onto the filling hose and press.... Fill the bottle ALL the way to the top before stopping the flow... When you slide the filled bottle off the hose, you will have the perfect amount of head space.  (remember the hose is displacing some of the liquid while filling)

Place a cap on the top of the bottle....

Crimp it down with the bottle capper.....

Place it in a box, upright....

Once you have filled all the bottles (I got 48) move them to a warm spot..... Now your beer will be ready in 7-10 days... preferably 10 though.  At only 7 days, there may still be some "green" flavors in the beer.

I know this seems like a long journey, and a lot of waiting... But your patience and perseverance will be rewarded.  Trust me.


Stay tuned for the final installment....   Let's Get Crackin!!

Cin Cin!!
~~

Tuesday, November 9, 2010

Well I'll Be a Monkey's Dunkel - Mashing, Sparging, Boiling and Pitching

Brewing Beer; Lesson 2 -

Most Americans are familiar with Hefeweizen due to small breweries like Widmer and Pyramid, though there are others that make Hefeweizen as well.  That cloudy, pale golden beer of lower alcohol content, capped off with a lemon wedge...  A delicious beer during the hot summer months.  What most Americans are NOT familiar with is that Wheat Beer does not stop at the cloudy glass of pale gold liquid.    Oh no my friends...  for there is the Darker side of Hefeweizen, otherwise known as Dunkelweizen.

Dunkelweizen tends to be a little higher in alcohol, about 5.5 - 7%.  It's still cloudy due to the yeast and proteins from the wheat, but unlike it's pale golden sibling, Dunkel is copper to dark amber in color.  It also blends Malty Chocolate flavors with the signature Banana/Clove of the yeast.  For me, this is a HefeWeizen for the cooler seasons of the year.  A great Autumnal beer, right up there with the Oktoberfest brews.

Before I begin, I am going to recommend an excellent book on Home Brewing, The New Complete Joy Of Home Brewing by Charlie Papazian.  Informative, yet whimsical, Charlie breaks everything down for you and takes you through the process from start to finish. Whether you are an extract brewer, a full mash brewer or a hybrid brewer, this is the book for you.  There is a newer 3rd Edition available at Amazon, but I am still using the 2nd.

There are a few other links I need to set you up with.... Those are yeast suppliers.... Both White Labs in San Diego, CA and Wyeast in Odell, OR (cultivated in the shadow of Mt. Hood)

Online Hop Suppliers..... Fresh Hops, HopTech and Hops to You.....

and basic Malt extracts and/or Grain suppliers at at Valley Vinter and BrewerMidwest Supplies or  Home Brew It

Just in case you do not have a brewer's supply shops in your area

OK let's get this brew in the fermentor!!

But first..... You need to sanitize everything with an iodine solution... this includes not only the carboy, but all the hosing, caps and fittings.... Anything that will touch the beer "after" it has been boiled and sterilized.

 
You will also need at least 2 stainless steel pots...  I am using a humongous 22 quart pot and an 8 quart stock pot.  This is so I can not only steep, but also have a clean vessel to heat up additional water if needed as well as a pot to sparge into.  Very handy....

Since I am doing a hybrid method using both cracked malted grain and a 50/50 mix of Barley and Wheat malt extracts it is necessary for me to steep the grains.  This will activate the 2 enzymes in the grain that will begin breaking down the starches into Dextrines and Fermentable Sugars.
I am using a 50/50 (yet again) mix of cracked Munich and White Wheat in a mashing bag to assist with later filtration.  (the grains must be cracked to increase surface area for the enzymes to work on - Just cracked though, not turned into flour)

 Heat some water in the smaller stainless steel pot.

When it reaches 130 degrees pour in the cracked malted grains. 

As the grains absorb the heat from the liquid the temperature will drop to between 115 and 122 degrees; steep for 15 minutes, maintaining the temperature at 122 degrees.

This first step is called "protein rest".  I like to call it the "proto phase" cause this is the step that activates the proteolytic enzymes in the grains. These enzymes break down the longer chained proteins into much shorter amino-proteins.  These proteins are needed for healthy yeast, and healthy yeast makes great beer.  (I will expand on this a little later when I cover the life cycle of yeast)

In a separate pot, heat some more water to 170 degrees.  This water will be added to the grains at the end of the protein rest in order to bring the temperature up to 150 degrees.

Hold the grains at 150 degrees for about 30 minutes.  This is the enzyme activation phase I.  At this temperature the diastic enzyme Beta-Amylase hits it's peak working temperature and begins breaking off Maltose and Maltriose sized molecules from the ends of the starches.  This Maltose (2 glucose molecules) & Maltriose (3 glucose molecules) will be fermented by the yeast.

Add a little more 170 degree water to bring the temperature up to 158 degrees and hold it there for 15 minutes. This is enzyme activation phase 2 and the diastic enzyme Alpha-Amylase hits it's peak working temperature.  It will begin to beak down the remaining starches into dextrins (which are molecules of 4 or more glucose molecules) that will add "body" to the finished beer.  The more dextrins in your beer the "chewier" it will be. The Beta-Amylase will continue working at this temperature as well, it will just work slower.

After the 15 minutes is up, you will have a lovely mixture of grain, water, proteins, maltose and other fermentable sugars as well as nonfermentable dextrin.  At this point you need to filter out the "spent" grains.  If they remain in contact with the water & enzymes for too long, tannin from the hulls will begin to seep into the liquid, and while a little tannin is OK for beer, you don't want too much... Your not making Cabernet Sauvignon, that needs the tannic acid as a preservative while it ages in a cave somewhere.

This is why I like the Mashing bag, it makes removal of the grains all that much easier...  So grab ends of the bag and stretch it over another pot.

Pour the 158 degree wort over the grains. (the grains and the bag together kind of act as a filter) After this, pour a little more hot water over the grains to ensure you have complete extraction of the sugars, proteins and dextrins from the grains. This process is known as "Sparging".

Now we have Wort... And spent grains.  So call up any friends who own cows, pigs, sheep or goats and tell them you have some free feed for them.  LOL

Now if you took this malted liquid and placed it in a pressure chamber, dropped the pressure so that water would boil at 150 degrees, you could condense your wort into Malt Extract, complete with active diastic enzymes... But since this small amount isn't enough to make 5 gallons we need to add Malt extract (reconstituted of course)

So place the wort you made into your largest pot, add about 3 1/2 gallons of water and heat it to 175 degrees.

While you are waiting for the wort/water to come up to temperature, go ahead and measure out your hops.  Since this is a weizen beer, the hop amounts will be minimal.  I used liberty (a noble hop) for the boiling hops (to create bitterness) and Saaz for the finishing, though they will lend their flavor, not so much of an aroma.  I would need a 3rd hop to be added to the wort 1-2 minutes before the end of the boil to extract aromas.  Since this is a Weizen, I am not going to be doing this.

All tucked into hopping bags for easy extraction and sparging (cause you sparge hops as well)

When the water reaches 175 degrees begin stirring the mixture with one hand, and pouring the malt extract in with the other. (this prevents the heavier syrup from falling to the bottom of the pot and scorching)

Once the extract has been sufficiently incorporated, bring the whole thing to a boil and drop in the bittering hops.

You will need to boil for 1 hour.  This not only extracts the resins from the hops, creating a faint bitterness, but also sterilizes the brew and shuts down any enzymatic action completely.  You will want to watch the boiling wort very carefully, cause boiling wort is like boiling honey... It will boil over... Seriously... You need to watch it or you may end up with a sticky mess all over the kitchen

Once the wort has been boiling for 45 minutes, it's time to add the flavoring hops for the last 15 minutes of the boil.  (If I was using aroma hops, I would add those the last 1-2 minutes)

Also, if you are using a wort chiller (a coil of copper pipe through which cold water is ran while it's submerged in the wort to cool it down) place the wort chiller in the boiling wort for the last 15 minutes to sanitize it.

Once boiling has been completed, remove the pot from the heat, remove the hopping bags and place them in a large funnel.

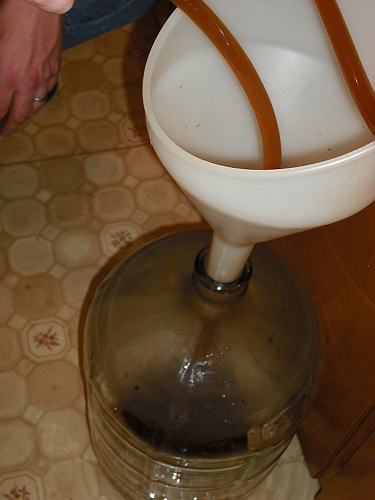
Place the funnel in the top of your sanitized carboy and pour about 2 quarts of cold water over the hops to sparge them.


While the Wort was hot, I added the Elderberry juice.... I decided on juice because elderberry seeds contain tannins, and I wanted to keep that to a minimum.  If you are going to use chopped fruit, add it to the hot wort after the boil is complete and steep for 15-20 minutes while the wort is 150-180 degrees. (Never boil fruit as this will develop the pectin)   Juice is a little faster as it can be simply be stirred into the wort and you can continue chilling.  Look Ma!  No steeping!

Add a little cold water to the Wort to assist in cooling.  During the hour long boil, you will have lost about 2 -3 quarts of water.

Connect the water source to the wort chiller and turn on the cold water to chill the wort to 75 degrees as fast as possible (alternatively, you can make an ice bath in the sink and chill the wort in the pot.)

Once the Wort is chilled to about 75 degrees....

you need to siphon it into the carboy, making sure to incorporate as much oxygen as possible. (this will be used by the yeast during respiration)

So make sure when you are siphoning that you splash the wort as much as possible. (this is the ONLY time you will incorporated oxygen into the beer)

Fill the carboy with fresh water to bring it up to 5 gallons.

Then, use a thief to take a sample and, using a hydrometer, check the specific gravity of your wort.

Be sure to write this number down, because you will take the gravity again later and compare the numbers to determine alcohol content.  My specific gravity was 1.058 at 75 degrees.

Taste the wort that was used to test the gravity...  This will teach you to identify what is in your wort versus what your finished beer tastes like... (Very important for future reference)

Return any extra wort back to the fermentor.

At this point you may "pitch" the yeast into the carboy.

WPL300 is White Labs' Basic German Weizen Yeast, as opposed to WPL320 which is American Weizen yeast or WPL351 which is a special Weizen yeast from Bavaria.

Place a stopper on top and roll the carboy back and forth on the floor to ensure the yeast is well mixed into the Wort.

Place a copper tube in the top, with a length of hosing to be used for the Blow-off (this usually occurs during the first 3 days)

Move the carboy to a quiet location, out of drafts where the temperature is fairly consistent and place the tube into a quart jar that is 1/2 filled with water, ensuring the end of the hose is completely submerged in the water (this will prevent bacteria from getting into your wort)  This acts as a temporary fermentation lock, but will allow the kraeusen to be expelled.

When the beer is "Blowing-Off" it will produce a bunch of foam and dead yeast at the top, which will be spewed out through the hose and into the quart jar. Trust me, you do NOT want this "kraeusen" in your fermentation lock, cause it's a pain in the butt to clean out and can possibly stick, not allowing any CO2 to escape... This can cause undo pressurization of the fermenting vessel and slow fermentation or worse, kill the yeast.

Once the beer is done with this process... Usually withing 3-4 days, remove the blow-off tube and replace it with a fermentation lock (this allows CO2 bubbles to escape but will not allow anything to get in)

Now you just have to wait for 7-10 days before "racking" the beer into a different carboy.......

Which I will cover in the next post ......  Yeast and You

Cin Cin!!
~~