Showing posts with label Aioli. Show all posts

Sunday, October 9, 2011

Salmon Chanted Evening - Salmon Croquettes

If you are a salmon lover, then living in the Pacific Northwest is definitely to your advantage. It's a signature food here.  OK, it's a little beyond that, it an institution. With all the Chinook (King), Coho (Silver) that comes from here and the Copper River coming out of Canada, it's no wonder... There is Sockeye (Red) and Keta (Dog Salmon - chum Salmon) too, but I personally don't really care for the overpowering fishiness of Sockeye and Keta always seems to have a squishy texture.  I like Silverbrite too, but it can be a little bit of a crap shoot.  Sometimes Silverbrite is a little too fatty, sometimes not fatty enough. 

Sockeye makes for EXCELLENT smoked salmon though.  I must admit that.  The stronger flavor pairs well with the smoke.

But I am digressing....  This is one of the best ways I know of to showcase a delicious hunk of salmon (especially Coho) when you don't really want to sit and eat a chunk of fish for dinner.  Crispy, delicate and delicious; Salmon simply adorn with shallot, green onion and panko.  An excellent starter to be sure, though honestly, I think I could make a meal out of these babies.

Salmon Croquettes
For Salmon:
4 cups Water
1/2 cup White Wine
8 Oz Salmon Fillet
1 TB Salt
1 TB Old Bay

For Croquettes:
8 oz Cooked Salmon Fillet
1 tsp Old Bay seasoning
1/2 tsp Kosher Salt
1 cup Panko
2 TB Unsalted Butter, melted
2 Scallions, finely chopped
1/2 Shallot, finely chopped
1 Large Egg, beaten
Juice of 1/2 lemon
Peanut oil for frying

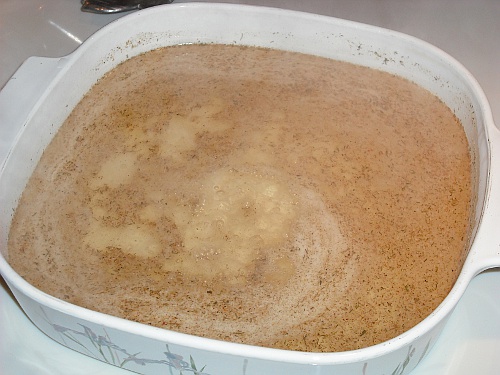
First, the Salmon must be cooked, so........
In a sauce pan, saute pan, or CorningWare Skillet, bring Water, Wine, Old Bay and Salt to a boil.

Remove the pan from the heat, slide the Salmon fillet into the boiling liquid, skin side down.

Cover and let it just hang out and gently cook for 10 minutes.

Carefully remove the salmon from the hot liquid with a spatula.

OK, now to make the actual croquettes. (you can skip this first step and use 8 oz of boneless, skinless canned salmon)
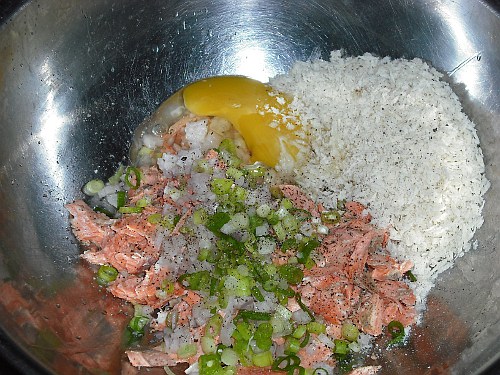
Break the salmon up into small pieces (be sure to remove any skin first) in a large bowl, then add the Old Bay, Kosher Salt, Panko, Butter, Scallions, Shallot, Egg, and Lemon juice.

Mix these until just combined, then cover and refrigerate for 30 minutes.

Spoon some of the salmon mixture into a 1/3-cup measuring cup and pack it with your hands.

Unmold and press gently with your hand to form a 2"-wide patty, then transfer the patty to a baking sheet lined with waxed paper.

Repeat to make an additional 5 patties.
Cover again, and refrigerate 7 hours or overnight.

Add enough oil to a 12" skillet to reach a depth of about 1/2" and heat over medium-high heat until oil registers 325° on a deep-fry thermometer.

Using a metal spatula, gently transfer the patties to skillet and cook.....

flipping once with the spatula, until golden brown, about 5 minutes total (2 1/2 min per side).

Transfer croquettes to a paper towel–lined plate and allow to drain briefly.

Serve with Aioli or Roasted Garlic/Lemon/Chervil Mayonnaise.


Mangia!!
~~

Tuesday, September 22, 2009

Summer Days Drifting Away, But Oh... the Potato Salad

Nothin' tastes better, on those hot Summer days, when the grill is fired up, than the cool creaminess of potato salad. It's just summer incarnate. Sadly, yesterday was the last day of summer and, much to my chagrin, I realized that I have not made a single potato salad. How was this possible? I have absolutely NO idea. It must have something to do with Mercury being in retrograde or some other cosmic force that has kept me from realizing, and making, this harbinger of "fun in the sun". So I decide that it was time, even though it is technically Autumn now, to whip up my favorite potato salad.

I really DO love this salad... The Vons/Safeway deli use to carry something similar. In fact, when I came up with this, I was originally trying to duplicate their recipe, cause it had been discontinued. Caution.... If you don't like dill, you ain't gonna like this, cause it's gotta lotta dill in it. You might even say, it's a "dilly" of a potato salad. HAR D HAR HAR...

Dilled Potato Salad


4 lbs small Red Potatoes
3/4 Cup Scallions, sliced (although this is even better with minced Red Onion)
1 1/2 TB Olive Oil
6 TB fresh Dill, minced
1 1/2 TB Red Wine Vinegar
3/4 Cup Aioli (Sauce Aioli)
3/4 Cup Greek Yogurt
3/4 tsp Dijon Mustard
Zest of 1 lemon
1 tsp Kosher Salt
1 1/4 tsp Black Pepper

Cut potatoes into bite sized pieces and cook until tender.

Drain and chill before continuing.

Make Aioli while potatoes are chilling. (which I actually did yesterday)

Mince onion and toss with potatoes, dill and olive oil.

In a small bowl mix Vinegar, Aioli, Yogurt, Dijon, Lemon Zest, Salt, and Pepper.

Pour over potato mixture and toss.

Chill 4 hours then devour directly from the bowl with a BIG spoon. ;)

Mangia!!
~~

Monday, September 21, 2009

"A" Okay Aioli, and That's No Yolk

Aioli is an often-confused condiment. Now when I speak of "aioli" I am talking about the French version from Provence, not the Spanish, Portuguese or other variations on the same theme. The confusion comes from the two schools of thought on exactly WHAT aioli is.

The first group states that it is a simple emulsion of Garlic, Lemon Juice and Olive Oil. Unlike Mayonnaise, Aioli contains no eggs, (at least, it's not suppose to) as the garlic itself is capable of providing the emulsion power, and is always made with Extra Virgin Olive Oil. No substitutions.

Enter Escoffier, the grandpappy of sauce classification, who deemed Aioli to be a small sauce that was built from Mayonnaise. Hmmmmm.... Even Larousse Gastronomique claims there is egg in Aioli. So suddenly Aioli has become nothing more than garlic flavored mayonnaise... Or has it?

True, you can add a ton of garlic to a cup of any insipid mayo and call it aioli. But it's still more than likely just "Garlic Mayonnaise". Don't get me wrong, that is all well and good, but it's not Aioli. What sets Aioli apart and makes it so unbelievably wonderful is the flavor combination of the Garlic, Lemon Juice and Extra Virgin Olive oil. So please, use an Olive oil that you love the flavor of, cause you are going to taste it.

Aioli is best served with fish and seafood, as well as steamed vegetables. It has a very strong flavor and, depending no the color of your olive oil, can have a slight green tinge to it. If you find this color disturbing or unappetizing, go ahead and add a second egg white at the end. The color will lighten significantly, without altering the flavor. So without further ramblings, here is the recipe for the Sauce Aioli that I use.


Sauce Aioli


6-8 gloves of garlic (or 10-12 cloves of roasted garlic)
1 1/4 tsp Sel Gris or Fleur de Sel; (Kosher salt will work, but you really need a coarse grain to help break down the garlic)
2 1/2 tsp Lemon juice
optional - 1 large Egg or 1 large Egg White (You can add an egg if you are worried that the sauce might break while mixing, but I don't,  unless I am using roasted garlic)
1/4 tsp White pepper, ground
3/4 cup Extra Virgin Olive oil (Be it Tuscan, Kalamata from Greece or Spanish; your choice)

In a mortar and pestle, add salt and garlic together

and crush

into a smooth paste. (Do not use a wood mortar and pestle)

Move the salt and garlic mixture to a non-reactive bowl and whisk the Lemon Juice and White Pepper.

Add the egg (if using) and 1/4 cup of the olive oil and begin whisking until an emulsion begins to form, then slowly pour the remaining olive oil into the mixture in a thin stream while you continue whisking.... (OK, ya caught me) or stick blending. (A stick blender is your best friend when making Aioli)

The sauce should become pale and flowing, like a sauce.... not thick and spreadable like a Mayonnaise. (it will actually be kind of yellowish green)

Serve over steamed vegetables, crab cakes or poached fish.

What am I doing with the Aioli? You mean besides eating it with a spoon out of the bowl while sitting in the corner rocking back and forth and giggling happily to myself?

Stay tuned for tomorrows one last taste of Summer....

Mangia!!
~~

Wednesday, April 29, 2009

Panini Pressing - A Simple Italian Panino

This is gonna be a really quick post, I got stuck at work tonight. Originally I had planned on a chicken dish, but you know what they say about the best laid plans of chicken and men.

So due to time constraints for dinner preparation, I made a simple panino. Yes, Panin'o' because I only made 1. Somehow, in the United States, "panini" became the trendy word, but it's actually the plural form. So, unless your eating more than one sandwich, which I have done on occasion, it's a "panino" not a "panini".

Oh and in Italy, panini are not necessarily grilled, and more often than not, serv ed on ciabatta or focaccia bread. I used Sourdough, just because it's my favorite.

Panino di Prosciutto y Finocchio

or Panini, if your making more than one ;)

2 Slices Sourdough bread
Aioli
2 Slices Prosciutto or Speck (smoked Prosciutto)
2 Sliced Provolone
1/4 of a Fennel Bulb
Basil leaves
Black Pepper
Melted Butter

Begin heating your grill pan.
Shave the fennel as thin as possible with a Mandolin.

Spread a very thin layer of Aioli over each slice of bread... (Less is more, you don't want it to start oozing out of the sandwich during grilling.)

Fold the 2 slices of prosciutto and lay them over the aioli, then top with shavings of fennel, basil leaves and a few grinds of black pepper.

Top this with thin slices of Provolone or Scamorza (Monterey Jack will work in a pinch)

Top with the remaining slice of bread.
Brush both sides with melted butter. (I use butter because it browns so very nicely)

Lay sandwich on hot grill and set top plate on top to compress sandwich.
Grill for about 2 - 3 minutes or until set with grill marks.


Mangia!!
~~

Sunday, April 26, 2009

The Thrill Of The Grill - Gorgonzola Stuffed Horseradish Burgers

This is not really so much a recipe post as it is a post about the really cool portable grill that I found. Granted, it's not a typical BBQ Grill since it has no lid, it's pretty much for simple grilling preparations only. But I love cooking over an open pit full of glowing coals. It's a genetic predisposition due to my Y chromosome. Don't laugh. It's deep and it's real. It hearkens to a more base existence, reaching into the primal centers of the male brain...

OK, yeah, enough of that. I have been sans grill for over a year now. Truth is, I don't live in the best part of San Diego... I kind of moved back here, from Palm Springs, in a hurry for a job and, having a dog, was desperate for an apartment as the 120 mile commute was killing me. Yeah, San Diego is a very pet UN-friendly city. The point is, I did not have room for my humongous gas grill, so I gave it away to someone who would love it and use it. I bought a smaller one, as I have a small patio area off to the side of apartment, however, it is part of the walk through and some one stole it!! Grrrrrrrr.

Because of this, I have not purchased another one, due to storage issues inside my apartment. That is, until this weekend. I found a little charcoal grill that is completely portable, and includes a built in cooler. If BBQ'ing was still allowed at the beach, here, it would be completely awesome, alas it shall have to suffice as my "mini apartment grill that cannot be stolen" because it fits in my tiny "what is suppose to be a linen" closet...

This is what it looks like...... Yeah, it even has a shoulder strap... Awesome!!

The top zipper reveals a soft sided beverage (Beer) cooler.

The side zipper allows the cooler section to be folded back.

To reveal the small enameled steel charcoal pit.

With the extend-able handled press grill underneath.

All I needed was some Real Charcoal (I don't like briquets, cause I don't know what they use to hold them together)

Light 'er up.... Add Grill and Cook me up some burgers...........


BooYAH!

So, because I wanted to play with my new grill, I scoured my refrigerator and freezer, and threw these together after I finished planting... Yes, I planted stuff this weekend too... But that is another post about herbes and citrus fruits...

Blue Stuffed Horseradish Burgers on Ciabatta with Aioli

1 lb Organic Beef
1 Egg
2 TB Chopped Flat-Leaf Parsley
1 TB Prepared Horseradish
Smoked Salt
Cracked Black Pepper
2 TB Panko or Italian Bread Crumbs

Mix everything together except the panko.

Then add the Panko (it just seems to work better that way)

Divide into 4 equal portions (They will be about 5 oz each because of the additional ingredients)

Divide each one of those into two pieces and flatten, placing crumbled Blue cheese in the center of one.

Cover with the other half of the patty and press together.

Repeat... then chill while the grill is heating up...

Take them to the grill and cook em up about 3 minutes on each side.

Meanwhile, slice Ciabatta rolls and apply copious amounts of Sauce Aioli (I have some left over in a squeeze bottle from a previous recipe) Oh, yeah, I was originally going to add Brown Mustard, but no one wanted it.

Place Burger and Romaine lettuce on the roll,

I did and press together and enjoy. (Sorry, I am so use to taking pictures inside under florescent lighting, that the outside ones aren't that great cause I forgot to adjust the camera)....


Mangia!!
~~