Showing posts with label European Butter. Show all posts

Friday, June 11, 2010

Sweetened Hummus Anyone? - Gluten Free Shortbread

Hey all. Sorry I have been gone for so long. It's just been a little crazy round here since the fishing trip ended a week ago. To top it all off, I lost by camera battery charger somewhere between Copperfield at Oxbow dam and home. (sigh) But the good news is that the one I had to ordered has arrived, so I have finally been able to charge the battery and retrieve the photos from my camera.... So I can bring you interesting shots like Bucky Beaver here,

who decided to visit us one morning around 5am while we were trout fishing in the Snake river.... Calmly making his way up river, with only a momentary pause to wonder what the heck we were doing in his river.

LOL.

But before I regale you with fish tails (though I have an awesome recipe to share with you) I have some unfinished business that I didn't get to before the end of May. There just wasn't enough time to finish the post and edit all the pictures before heading east and with the camera charger fiasco upon returning, the whole thing was placed on the back burner.

I am speaking of the Bakespace Monthly Challenge. The month of May was to convert a recipe into a gluten-free recipe. Sadly, I was unsuccessful... That is putting it mildly. I would call my attempts colossal failures.

I deemed it necessary to attempt a decent shortbread recipe, sans flours containing gluten. This left out Oat flour, Wheat flour (of course), Triticale, Rye, Spelt, Kamut and any of the other myriad "go to" flours that I usually have lying around in the freezer (for they will all go rancid fairly quickly) Luckily, I still had a few options... White Rice Flour (for breading), Garbanzo flour (for cheating at Hummus), Tapioca Flour (a sauce thickener), and Corn Flour (which I use in Corn Biscuits) I also had Coconut Flour, Buckwheat Flour and Chestnut Flour.... But I would only use those for a "Flavored" shortbread.... Since they have a VERY distinctive taste.

The only thing I had to purchase that was not part of my normal repertoire was Xanthan Gum (which is indeed a little spendy) Luckily, I was able to find it in the supplement aisle of the health food store, where it came in a smaller quantity than I would have been required to purchase from Bob's Red Mill. After all, I would rather spend 5 bucks for a 10 year supply than 15 bucks for a 25 year supply of the stuff. Especially since I am not planning on making a career out of Gluten-Free baking.

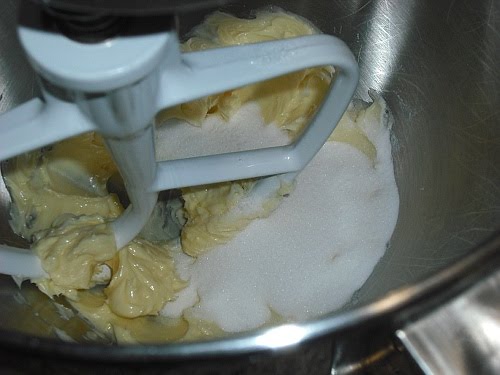
The first recipe I played with was a combination of Corn Flour, Rice Flour and Xanthan gum...

After 4 attempts and altering the proportions of rice flour each time, I have come to the conclusion that ANY amount of corn flour in anything not only gives it a gritty mouth feel, but makes it taste like a corn biscuit. And while I truly love corn biscuits with my chili, I do not so much care for them when they are trying to impersonate shortbread.

Back to the drawing board. Maybe I just take shortbread too seriously. hmmmmm. ;)

For the second formulation experiment, I decided to retain the Rice flour, but use the Garbanzo and Tapioca flours. This time I only experimented 3 times before I had to leave for the Snake river trip on the 26th. Below is the 3rd recipe I tried.

40 g Garbanzo Flour
70 g Rice Flour
30 g Tapioca Flour
2 tsp Xanthan gum
40 g Super Fine Sugar
78 g European Butter
2 tsp Celtic Sea Salt

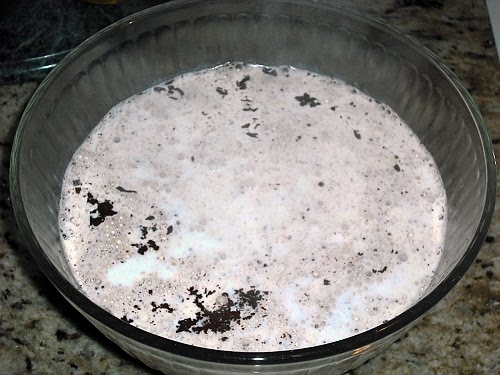
It had perfect color when removed from the oven.

It un-molded beautifully as well;

It was easy to cut and showed great promise.

The texture was good, though not perfect, but it was the closest I had come at this point. The only real issue was that it tasted like sweetened Hummus. Oh, you didn't notice it so much upon the first bite; or even the second bite for that matter. But as you made your way through, what should have been a little slice of heaven, this almost insidious flavor began to build on your tongue, until at the end you were wishing for some flat bread, a slab of Feta and some Retsina.

My personal opinion? I don't know if shortbread can be made without actual WHEAT flour. The primary flavor of shortbread (unless you add flavoring) is the butter. Most of the other "Mild" flours that I attempted to use have there own distinct taste that overpowers the butter's flavor. You can get really close to the texture, but for me, it really isn't shortbread.

So.... Catastrophic Failure!!!

On a happy note, though I have not tried it personally, Bob's Red Mill DOES make a Shortbread Cookie mix that has all sorts of interesting stuff like Whole Grain Sorghum and Potato Starch flour in it. You are required to add your own butter and an egg yolk, but for all intensive purposes, I think if I have to make Gluten-Free shortbread for anyone, I will simply be purchasing that the next time. LOL

Mangia!!
~~

Sunday, May 23, 2010

On the Trail of Petticoat Tails - Shortbread in a Stoneware Mold

As I talked about a couple posts back, I have a petticoat tail mold for my shortbread baking pleasure. I quickly found out that my traditional 1-2-3 recipe was not gonna fly when using this earthenware pan. So some alterations were in order....

Well, 11 batches of Shortbread later, I think I have come up with a stoneware mold recipe that I am happy with; along with a few tricks with the oven temperature to keep the edges from getting too brown. The texture finally seems right. (or at least the way I have always liked my shortbread) Sandy, with a little bit of a chew too it, but still melts in your mouth. Oozing with butter flavor, lightly sweet with just a hint of a saltiness.

The perfect accompaniment to a cup of Darjeeling or Earl Grey.

Shortbread Petticoat Tails

78 g Cultured European Butter (It's usually Unsalted)
45 g Super Fine Sugar
3/4 tsp Celtic Grey Salt (Kosher Salt will work just fine)
140 g AP Flour

Preheat oven to 325 degrees.

Beat the butter until creamy and smooth.

Add Super Fine Sugar and Salt....

Then beat again until light (not fluffy - If you aerate it too much it will try to rise in the oven).

Remove bowl from the mixer and work in the flour with a fork or a spatula.

You want to mix the flour until you achieve a cornmeal like texture.....

That will just barely hold together when squeezed.

Sprinkle the mold with a thin layer of AP Flour.

Pour the crumbly dough into the mold

and press it in, starting at the middle.... and working your way our to the edge,

making sure it's all nice and even in thickness. (it took me a couple times to get this right)

Prick the backside with a fork to allow steam to escape. (there won't be as much if you used the European butter, since it contains less water)

Bake for 5 minutes; then reduce the heat to 275 and continue baking for an additional 30 minutes. (this heats up the stone to get good color, but doesn't allow the butter to over-brown at the edges)
Remove from the oven and let it set for 10 minutes.

Then work around the edge with an offset spatula, just to make sure the sides didn't stick.

Flip the mold over and release the shortbread round.

Slice with a VERY long knife into wedges and let cool completely. (the texture changes dramatically as it cools)

Enjoy with a nice cup of tea, or coffee.

Or simply by itself.... YUM!!!


Mangia!!
~~

P.S. For the curious.... Teacup by Duchess Bone China "Thistle" Pattern; side plate by Paragon Bone China, no pattern name that I am aware of.

Sunday, May 9, 2010

A Little Caramel For Carmel - Fleur de Sel Caramel Filled Cake

Our story begins back in 2008, with the release of the September issue of Bon Appètit. There was an exposé on the "Vanilla Bake Shop" in Santa Monica, CA. Up for consideration was this completely decadent chocolate cake filled with Fleur de Sel Caramel all topped off with a rich Ganache.

Sounded completely and totally delectable! But I knew that I would never actually eat it, so I never made it. That is until my friend Ken's Birthday. He had no idea what kind of cake he wanted, so I whipped out my handy dandy copy of Bon Appètit and said, "How bout THIS one?"

So I made it, and it was a big hit. I even ate a whole piece myself. The Fleur de Sel Caramel really "kicks it up a notch".

Well, there is another Birthday out there. Carmel, the wife of my parent's pastor, is having a birthday. Well, to be honest, she already had her Birthday... I am just running about 1 month behind. LOL

Since she loves both chocolate and caramel, I decided that it would be a good idea to whip out this recipe again. Cause it really is awesome.

The Original Recipe and instructions can be found here at the Bon Appètit site. As I have re-written this according to my experiences, along with changing a couple of ingredients.

Fleur de Sel Caramel Filled Cake

Ganache
20 oz 58% or higher Bittersweet Chocolate, chopped
2 1/2 cups Heavy Cream

Caramel Filling
1 cup Granulated Sugar
1/4 cup Water
2 TB Clover Honey
1/2 cup Heavy Cream
4 TB Unsalted European Butter, diced
4 TB Crème Fraîche
3/4 tsp Meyer lemon juice
Large pinch of fine fleur de sel plus additional for assembly

Chocolate Cake
2 cups Granulated Sugar
1 3/4 cups AP Flour
3/4 cup Natural Cocoa Powder
1 1/2 tsp Aluminum Free Baking Powder
1 1/2 tsp Baking Soda
1 tsp Kosher Salt
2 large Eggs
8 TB unsalted European Butter, melted
1 cup Hot Water
1 TB Espresso Powder
1 cup Whole Milk
1 1/4 cups Almonds, toasted and coarsely chopped

Make the Ganache first, so you can put it in the refrigerator to chill a little. I have already gone over Ganache once before, and while this will not be a poured ganache, the proportions are the same for a spreadable ganache - 1 to 1. I chose to combine 2 of my favorite chocolates. Scharffen Berger and Dagoba.

Both contain only Cocoa mass, Sugar, Cocoa Butter...

Look Ma! No milk solids. ;)

20 oz 58% or higher Bittersweet Chocolate, chopped
2 1/2 cups Heavy Cream

Place chopped chocolate in large bowl.

Pour cream into a small sauce pan. (Just for fun I weighed it, coincidentally 2.5 cups is 20 oz)

Bring cream to simmer over medium-low heat, to prevent scorching.

Pour cream over chocolate; let it sit for 2 minutes - NO touching,

just let them hang out together.

Begin whisk in the center of the bowl....

Then slowly....

but surely

it will come together in a dark velvety smooth deliciousness.

Cool, then cover with plastic and place in the refrigerator to finishign firming up a little while.....

you make the Caramel sauce..... This is a "wet" caramel, meaning it starts with water. These are usually more fool-proof than "dry" caramels, which start with only sugar. I wanted to make it extra special, so I went and purchased some cultured European Butter to use in both the caramel and the cake.

1 cup Granulated Sugar
1/4 cup Water
2 TB Clover Honey
1/2 cup Heavy Cream
4 TB Unsalted European Butter, diced
4 TB Crème Fraîche
3/4 tsp Meyer lemon juice
Large pinch of fine fleur de sel

Stir Sugar, Water, and Honey in deep saucepan over low heat until sugar dissolves.

Raise the heat to medium and place the cover over the pan, cooking for 4 minutes. (This allows the steam to wash the crystals from the side of the pan)

Remove the cover and allow it to boil until it becomes a dark amber color.

Remove from heat and add the cream, very carefully

Cause it will bubble up on you. mixture will bubble.

Stir in the butter....

and the crème fraîche.

Lastly, add the meyer lemon juice and pinch of fleur de sel.

Pour into a small bowl and set aside to cool while.....

you make cake......

Preheat to 350°F.
Butter the bottom only, of two 9-inch cake pans.

Line bottoms with parchment paper rounds....

Then Butter and Flour the parchment, then set aside.

You will need to collect the rest of the ingredients, cause this cake goes together fairly quickly.

So, sift Sugar, Flour, Cocoa Powder, Baking Powder, Baking Soda, and Salt into the bowl of your mixer.

Whisk the Eggs.

Melt the Butter.

Mix the Espresso Powder and Hot Water together.

And measure out the Milk... OK, Your ready to go. Let's Make Cake!

Start the mixer on Low speed (so you don't have a flour bomb going off in your face.)

Add the milk first,

then the beaten eggs,

and melted butter mixing until just blended.

Increase the speed to medium and beat for 2 minutes; until it becomes slightly "fluffy" looking.

Lower the speed of the mixer and add the espresso/Hot water; beating until blended (the batter will be really thin).

Divide the batter between the pans (about 3 1/4 cups in each pan).

Bake cakes until tester inserted into center comes out clean, 30 - 35 minutes.

Cool cakes on a rack for 10 minutes.

Cut around cakes with a knife or offset spatula and

turn out onto racks, peeling off parchment to cool them completely.

Once the cakes are cooled, it's time for assembly.......

Grab the Fleur de Sel, cause you need it again, for the assembly.
Grab the Ganache from the refrigerator..... Stir it a few times to makes sure it is of spreadable texture...

Place 1 1/4 cups of sliced almonds on a baking sheet.

Bake at 350 degrees for about 8 minutes, until lightly browned and toasty smelling, then set aside to cool.

Place 3/4 cup of the ganache in a pastry bag fitted with a 1/4 inch round tip

Cut each cake horizontally in half with a large serrated knife, or one of those nifty cakes saws.
Place a small dollop of ganache on the cake board or your cake plate to hold the cake in place.

Place the 1st layer on the board/platter and spread 1/2 cup of the ganache over the surface.

Pipe a ring of ganache around edge of the layer.

Spread 1/4 cup of the caramel filling evenly inside ring.

Sprinkle caramel with large pinch of fleur de sel;

then sprinkle with about 1 TB of the toasted almonds.

Top with a second cake layer then repeat the above steps -- ganache, ganache ring, caramel filling, fleur de sel, and almonds. Make sure to place the very top layer cut side down, then spread the remaining ganache over top and sides of cake.

Press remaining almonds onto sides.

Cover with cake dome and chill.

Let cake stand at room temperature 1 hour before consuming.

HAPPY BELATED BIRTHDAY CARMEL!

Mangia!!
~~