But Moses supposes erroneously,
For Moses, he knowses his toeses aren't roses,
As Moses noses smells Cookies and Tea.
OK, I know that was completely, utterly and irrevocably
LAME.... But I had to get it out cause it was plaguing my mind the whole time I was baking these enticing cookies. LOL
Sugar cookies come in many forms. Some crisp, some chewy and some are soft and slightly cake like. And while the ingredient list is usually fairly simple, being Butter, Sugar, Eggs, and Flour, there always seems to be room for a few "extras" like Sour Cream or Heavy Cream....
In this case I have forgone my "family" sugar cookie recipe, a mace flavored crispy cookie that works well when one is decorating shapes with frosting, and decided to go with a softer version from by grandmother that contains Sour Cream. My only addition to these delicious cookies is to give them some other "flavor" besides the standard Vanilla. Thusly, I have chosen Rose Water, to give them a little exotic flair.
What exactly IS Rose Water? Technically speaking, it is the water that is left over from the distillation of Damascus Rose petals to obtain the essential oils (
known as Rose Otto, or Attar of Rose) for use by the perfume industry. In essence (
ha ha) it's by-product that has found it's way into kitchens across the globe as a flavoring agent. From Turkish Delights (
loukoum) to Custard and Rice Pudding, right on down to Curry pastes and Lamb Tangine. Think of it as a way to lower the "Carbon footprint" of the perfume industry. LOL
I normally reserve it for Cocktails (
which is fairly common place in the U.S) and on those special occasions when I make Baklava. But today I have decided to branch out and I am very pleased that I did. I am already planning to make some
Orange Blossom Water cookies as well. (
A by-product from the distillation of Orange Flowers, usually called Neroli,
as opposed to Pettitgrain
which is a distillation of the leaves and bark of the same Orange tree)
There are those that might complain that it smells like Soap or "Grandma's Perfume". It's actually the other way around, Soap and Grandma's Perfume smell like rosewater. LOL
I am gonna warn you now, this is a REALLY sticky dough to work with. You only get one rolling and cutting out of it before you have to re-refrigerate it. It's the sour cream that makes it so sticky. Over the years I have tried to add more flour to compensate, but it doesn't really work... The cookies just taste floury and odd. SO I have come up with a solution, since this makes 6 dozen or so. Simply divide the dough into three pieces before chilling. Then, after you have used the first piece, you can re-wrap it, throw it back in the refrigerator and grab one of the other two, well chilled, pieces to work with. It helps a little; at least you can get three batches of cookies done before you are brought to a stand-still waiting for dough chillage. Then I combine all the remaining dough together for 1 final rolling. (
kind of the way I do with Linzer Augen) Sticky dough hardships aside, they are WELL worth the trouble....
I am just sayin. ;)
Rose Water Sugar Cookies
Printable Recipe
4 1/2 cups (
625 g)(
22 oz) AP Flour
1 tsp Baking Powder
1 tsp Baking Soda
1 tsp Kosher Salt
1 cup (
227 g)(
8 oz) Cultured Butter (
or Unsalted)
1 1/2 cup (
325 g)(
11.5 oz) Granulated Sugar
2 Large Eggs
1 cup (
240 g)(
8.5 oz) Sour Cream (
not light or fat free)
1 TB Rose Water
Demerara Sugar or Rose Petals or Sugared Rose Petals (
procedure follows)
Whisk Flour, Baking Powder, Baking Soda and Salt together in a medium bowl, then set aside.
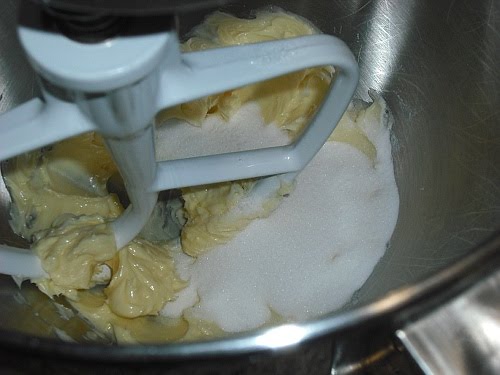
Cream the Butter and Sugar together until light and fluffy.
Beat in the eggs, one at a time, mixing well after each addition so as to not break the emulsion.
Mix Sour Cream and Rose Water together in a small bowl.
With the mixer on low speed, begin adding the Flour mixture and the Sour Cream mixture, alternating, beginning and ending with the flour.
(
1/3 of the Flour, 1/2 of the Sour Cream, 1/2 the remaining Flour, the remaining Sour Cream, the rest of the Flour)
Divide the resulting dough into 3 chunks, wrap tightly in plastic wrap and refrigerate for at least 4 hours, but preferably overnight.
The next day, preheat the oven to 375 degrees and line your baking pans with parchment paper.
Remove 1 of the wrapped dough balls and turn out onto a heavily floured surface (
cause this dough will get sticky REALLY quick)
Roll to 1/4 inch thick with a well floured rolling pin and cut 3 -inch cookies.
Move the cookies, with a well floured spatula, to the lined baking sheets.
Scoop up the dough scraps, press them together and re-wrap with plastic before placing back in the refrigerator. (
If you are making more cookies, grab one of the other dough balls)
If you have chosen to decorate them with Demarera Sugar, sprinkle it on the tops of the cookies now, if you are using rose petals, wait until after baking.
Bake the cookies for 10-12 minutes.
Move the cookies to racks and allow to cool completely before serving.
If you forwent the Demerara Sugar and have opted for Rose Petals as decor, you have 2 choices.
But FIRST you need to pick some roses that are free of any sprays. I like the old fashioned "single" roses for this, cause the petals are not quite as big as the Tea or Floribunda types.
Remove the petals from your chosen roses, then rinse and dry them gently.
OK, now the choices... Fresh or Sugared?
For Fresh.....
Simply place a small dab of crusting buttercream on top of each cookie to be adorn with a petal.
Place the rose petal on top, pressing gently into the frosting.....
Tah Dah! (
the cookies will have to be stored in an airtight container in the refrigerator to prevent the petals from wilting)
If you have left over petals, you can cover them with Plastic wrap and store in the refrigerator as well.
For Sugared Rose Petals.....
1 tsp Meringue Powder
1 tsp Cold Water
Super Fine Sugar
Soft Paint Brush
Paper Towel
Mix the Meringue Powder and Water together with a small whisk.
Dip your paint brush in the reconstituted egg white and "paint" reach petal on both sides. (
Hold the petal by the point where it was attached to the flower base - you will be cutting that part off later anyway, cause it's bitter)
Sprinkle with Super Fine Sugar on both sides.
Then set on a paper towel and allow to dry for 24 hours (
yeah I know, you kind of have to plan ahead for this)
Before applying the petals to the cookies, clip off the little point that you were holding during the sugaring process. It is SUPER bitter, and not very tasty, so it has to go.
Just as before, apply a small dab of crusting butter cream and simply press the sugared Rose petal into the frosting. These should
not be refrigerated, cause the sugar will
melt off the petals due to the humidity.
Looks like everything's coming up roses... Har dee har har
Mangia!!
~~


