I have often sung the praises of Crème Fraîche, the luxuriant cultured cream product of Normandy. Not only does it have a more delicate flavor than sour cream, being slightly nutty with buttery undertones, it's actual fat content is higher (about 30%) as opposed the 18-24% found in sour cream. This is fortuitous because you can heat it without it separating or seizing the way sour cream and yogurt do. On top of all that, you can whip it just like Heavy Cream...
There is only one drawback to Crème Fraîche, it's exorbitant price. A mere 5 oz container is often over 6 bucks. That's the domestic versions, if you want the stuff from France be prepared to fork out even more dough. Sadly, 5 oz is just over 1/2 a cup. But I am gonna let you in on a little secret.... You can make your own. (That is why I use it so much)
Though Crème Fraîche, in France, is made with UN-pasteurized milk and utilizes the natural bacteria in the area (which is why the best stuff comes from the Normandy region of France) Those cultures have been isolated and can be "purchased" from several vendors online in powdered form (which you can do if you like but the culture costs about as much as a tub of Crème Fraîche) Here in the United states, all cultured products MUST be made with milk or cream that has been pasteurized first (this includes cheese as well as sour cream, buttermilk, yogurt and such) thus the French method is not possible here in the U.S. HOWEVER.....
As with most "cultured" products such as Buttermilk, Yogurt and Sour Cream, Crème Fraîche is alive. That means that if you can resist eating the last couple of Tablespoons out of the tub, you can make more. True, that means you have to spend this initial 6 dollars for a tub, but continuously re-culturing your own will only cost as much as the heavy cream you are using. Which is usually about 3 buck a pint, or 5 bucks for a quart (that's a lot of Crème Fraîche potential) It won't taste like the French stuff... But you can get pretty darned close.
Let's get into a little food label word play... There is a difference between "pasteurized cultured cream" and "cultured pasteurized cream". "Pasteurized cultured cream" means the product was pasteurized AFTER it was fully cultured, meaning that once the bacterium, that make the cream tasty, were done eating all the sugars, they pasteurized the product to prevent further bacteria growth and further "souring". "Cultured pasteurized cream" simply means that the cream was pasteurized before it was inoculated with bacteria, then it was packaged and sent to your grocers' chill case. Thus if left at room temperature for any length of time, the bacteria will "wake up" and continue consuming the lactose in the cream and further sour the product. This is what you want the label to say.... Otherwise the culture is dead and this will not work.
You may be asking yourself why I am going to all the trouble of using Crème Fraîche as a culture base, since there are a million recipes out there for making Crème Fraîche with buttermilk as a starter. Well, it's time for a little Lacto-Bacter 101.....
The Crème Fraîche "culture" is actually a "cocktail" of bacterium... These include, but are not limited to L. cremoris, L. lactis, and L. biovar diacetylactis. Buttermilk, however, only has L. lactis (except in the case of Bulgarian Buttermilk when L. bulgaricus is used). This is great for culturing butter, but not so much for making Crème Fraîche. When we look at Yogurt we begin to see Thermophilic bacteria that need warmth to "ferment", being composed of S. Thermophilus mixed with a little L. acidophilus, L. helveticus, L. bifidus longum and L. bifidus infanti. Sour Cream usually depends on Leuconostoc mesenteroides cremoris (say that 5 times fast) though sometimes it contains L. lactis, just like Buttermilk.
All of these mixes have a slightly different flavor. Thus, if you attempt to use Buttermilk as a starter culture for Crème Fraîche, you will have cream that tastes like Buttermilk, not Crème Fraîche. This is primarily due to the lack of L. biovar diacetylactis which produces the "Buttery" and Nut-like flavors that have made Crème Fraîche so popular, so luxuriously delicious and the main reason it works so well in both sweet and savory applications. (Like Mascarpone - But thats another post)
One other thing, in regards to the heavy cream you use; just as with cheese, Ultra-Pasteurized Heavy Cream is a no-no. It is a completely dead food with denatured proteins and warped fat molecules. Don't use it, it's worthless. Normally I am big on eating Organic as much as possible, but I have noticed a disturbing trend. Most of the organic dairy products, from milk to cream and everything in between, are now being UHT'd. I fail to understand why the producers are taking a perfectly healthy and viable product and "killing" it by super-heating it... Then charging MORE for it because of the Organic label.... I laugh in their face,(Ha Ha!) and refuse their dead products. Luckily, there ARE a few Organic dairy producers who simply pasteurize their products. Whew!
OK, I am off my soapbox... . Let's make some Crème Fraîche
1 pint pasteurized Heavy Cream (should be over 30% - preferably 36-40%)
3 TB Crème Fraîche
1 Mason Jar
1 lid for the Mason Jar
1 warm spot to let is set and ferment (65-75 degrees)
Patience
Remove your current tub of Crème Fraîche from the refrigerator and let it come to room temperature.
Pour pasteurized heavy cream into a medium saucepan and place over low heat.
Heat the cream to between 80 and 90 degrees (you are just trying to take the refrigerator chill out of it)
Remove the Heavy Cream from the flame and whisk in the Crème Fraîche, making sure it is "dissolved" into the cream for maximum exposure to available sugars.
Pour the whole mix into a mason jar.
Cover with a lid and place in a warm place for 24-36 hours (don't worry, the lacto-bacter will protect the cream from spoiling because they will acidify the cream)
Once the cream is "thickened" place in the refrigerator to chill for several hours. (this will thicken it further)
If the Crème Fraîche is not as thick as you would like, simply drain with jelly muslin or several layers of cheese cloth for an hour or 2 to remove some of the whey. I don't usually do that because I prefer a little more movement in my Crème Fraîche. Besides, after it sits for a day or two in the refrigerator there will be some separation anyway, you can simply pour off the whey at that point.
Spoon the unctuous deliciousness into a tub of your own.... It will keep in the refrigerator for about 2 weeks. (no freezing it will kill the culture and you will have to start over)
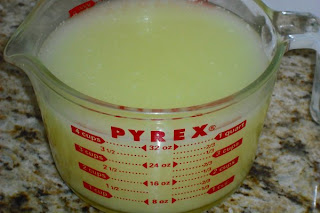
In case you were noticing, I made a double batch (1 quart). Why did I make so much? Cause I need at least 1 pint to making Lavender Crème Fraîche Ice Cream and I needed some left over for the next dessert I posting about (made with fresh blackberries & hazelnuts - Very "Oregon" ) as well as some to continue my culture... :)
Mangia!!
~~
There is only one drawback to Crème Fraîche, it's exorbitant price. A mere 5 oz container is often over 6 bucks. That's the domestic versions, if you want the stuff from France be prepared to fork out even more dough. Sadly, 5 oz is just over 1/2 a cup. But I am gonna let you in on a little secret.... You can make your own. (That is why I use it so much)
Though Crème Fraîche, in France, is made with UN-pasteurized milk and utilizes the natural bacteria in the area (which is why the best stuff comes from the Normandy region of France) Those cultures have been isolated and can be "purchased" from several vendors online in powdered form (which you can do if you like but the culture costs about as much as a tub of Crème Fraîche) Here in the United states, all cultured products MUST be made with milk or cream that has been pasteurized first (this includes cheese as well as sour cream, buttermilk, yogurt and such) thus the French method is not possible here in the U.S. HOWEVER.....
As with most "cultured" products such as Buttermilk, Yogurt and Sour Cream, Crème Fraîche is alive. That means that if you can resist eating the last couple of Tablespoons out of the tub, you can make more. True, that means you have to spend this initial 6 dollars for a tub, but continuously re-culturing your own will only cost as much as the heavy cream you are using. Which is usually about 3 buck a pint, or 5 bucks for a quart (that's a lot of Crème Fraîche potential) It won't taste like the French stuff... But you can get pretty darned close.
Let's get into a little food label word play... There is a difference between "pasteurized cultured cream" and "cultured pasteurized cream". "Pasteurized cultured cream" means the product was pasteurized AFTER it was fully cultured, meaning that once the bacterium, that make the cream tasty, were done eating all the sugars, they pasteurized the product to prevent further bacteria growth and further "souring". "Cultured pasteurized cream" simply means that the cream was pasteurized before it was inoculated with bacteria, then it was packaged and sent to your grocers' chill case. Thus if left at room temperature for any length of time, the bacteria will "wake up" and continue consuming the lactose in the cream and further sour the product. This is what you want the label to say.... Otherwise the culture is dead and this will not work.
You may be asking yourself why I am going to all the trouble of using Crème Fraîche as a culture base, since there are a million recipes out there for making Crème Fraîche with buttermilk as a starter. Well, it's time for a little Lacto-Bacter 101.....
The Crème Fraîche "culture" is actually a "cocktail" of bacterium... These include, but are not limited to L. cremoris, L. lactis, and L. biovar diacetylactis. Buttermilk, however, only has L. lactis (except in the case of Bulgarian Buttermilk when L. bulgaricus is used). This is great for culturing butter, but not so much for making Crème Fraîche. When we look at Yogurt we begin to see Thermophilic bacteria that need warmth to "ferment", being composed of S. Thermophilus mixed with a little L. acidophilus, L. helveticus, L. bifidus longum and L. bifidus infanti. Sour Cream usually depends on Leuconostoc mesenteroides cremoris (say that 5 times fast) though sometimes it contains L. lactis, just like Buttermilk.
All of these mixes have a slightly different flavor. Thus, if you attempt to use Buttermilk as a starter culture for Crème Fraîche, you will have cream that tastes like Buttermilk, not Crème Fraîche. This is primarily due to the lack of L. biovar diacetylactis which produces the "Buttery" and Nut-like flavors that have made Crème Fraîche so popular, so luxuriously delicious and the main reason it works so well in both sweet and savory applications. (Like Mascarpone - But thats another post)
One other thing, in regards to the heavy cream you use; just as with cheese, Ultra-Pasteurized Heavy Cream is a no-no. It is a completely dead food with denatured proteins and warped fat molecules. Don't use it, it's worthless. Normally I am big on eating Organic as much as possible, but I have noticed a disturbing trend. Most of the organic dairy products, from milk to cream and everything in between, are now being UHT'd. I fail to understand why the producers are taking a perfectly healthy and viable product and "killing" it by super-heating it... Then charging MORE for it because of the Organic label.... I laugh in their face,(Ha Ha!) and refuse their dead products. Luckily, there ARE a few Organic dairy producers who simply pasteurize their products. Whew!
OK, I am off my soapbox... . Let's make some Crème Fraîche
Crème Fraîche
1 pint pasteurized Heavy Cream (should be over 30% - preferably 36-40%)
3 TB Crème Fraîche
1 Mason Jar
1 lid for the Mason Jar
1 warm spot to let is set and ferment (65-75 degrees)
Patience
Remove your current tub of Crème Fraîche from the refrigerator and let it come to room temperature.
Pour pasteurized heavy cream into a medium saucepan and place over low heat.
Heat the cream to between 80 and 90 degrees (you are just trying to take the refrigerator chill out of it)
Remove the Heavy Cream from the flame and whisk in the Crème Fraîche, making sure it is "dissolved" into the cream for maximum exposure to available sugars.
Pour the whole mix into a mason jar.
Cover with a lid and place in a warm place for 24-36 hours (don't worry, the lacto-bacter will protect the cream from spoiling because they will acidify the cream)
Once the cream is "thickened" place in the refrigerator to chill for several hours. (this will thicken it further)
If the Crème Fraîche is not as thick as you would like, simply drain with jelly muslin or several layers of cheese cloth for an hour or 2 to remove some of the whey. I don't usually do that because I prefer a little more movement in my Crème Fraîche. Besides, after it sits for a day or two in the refrigerator there will be some separation anyway, you can simply pour off the whey at that point.
Spoon the unctuous deliciousness into a tub of your own.... It will keep in the refrigerator for about 2 weeks. (no freezing it will kill the culture and you will have to start over)
In case you were noticing, I made a double batch (1 quart). Why did I make so much? Cause I need at least 1 pint to making Lavender Crème Fraîche Ice Cream and I needed some left over for the next dessert I posting about (made with fresh blackberries & hazelnuts - Very "Oregon" ) as well as some to continue my culture... :)
Mangia!!
~~


