There is something comforting, on a dreary day, about having a cup of Earl Grey with a spot of cream. The bergamot orange just seems to brighten the mood. But I have discovered something even better. It involves having cream with a little Earl Grey. :)
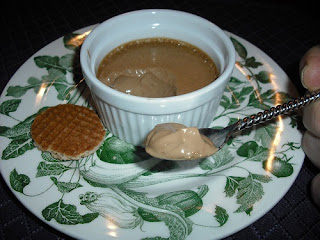
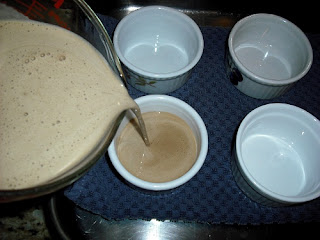
Technically, this works better if you have the actual "pots de creme" that are what give this custard dessert its name. They are kind of like a demitasse (espresso sized) cup with a lid. But in a pinch, you can use ramekins; which I have have done here, because I only have ONE of these little pots.
 The only reason I have this one, is because I happened to see it on eBay, it's shaped like a thistle and I thought it would be a cool sugar bowl, which is exactly what I use it for.
Making the custard for pots de creme is just like making the custard for creme brulee. The only real difference is the lack of a crunchy melted sugar top and the fact that it is served in a deep dish rather than a shallow one. The plus side of pots de creme is that lack of a burnt sugar topping allows for more diverse flavorings. As much as I love burnt sugar, even I must admit that it doesn't necessarily go with everything under the sun. Hey, and without the sugar topping, pots de creme actually contains fewer calories than creme brulee. Yet it is still just as smooth, creamy and delicious. I call that a win win.
I already had my heart set on making this, since the weather was so drippy and cold, but I was out of loose leaf tea. Instead of running to the store, I tore open some Earl Grey tea bags that I had in the pantry... bad idea. Tea bags usually contain much finer leaves, so unless you have cheese cloth to filter the custard through (I was out of that as well) then I highly recommend using loose leaf tea.
So the next time the sky is cloudy and gray, add some sunshine to your day and chase those oppressive blues away with Pots de Creme infused with Earl Grey.
 1 1/2 cups (355ml) (12 oz) Heavy Cream
1/2 cup (118ml) (4 oz) Half and Half
zest of 1 Cara Cara Orange or a Meyer Lemon
2 TB loose Earl Grey Tea leaves (not tea bags, the tea is too fine)
4 large Egg Yolks
1/2 cup (100g) (3.5 oz) Granulated Sugar
Pinch of Kosher Salt
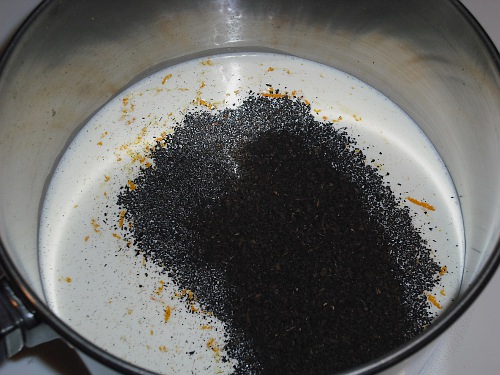
Combine Heavy Cream, Half and Half, Orange Zest and Tea Leaves in a saucepan.
 Bring to a simmer over medium heat.
 Remove from the flame, cover and allow the mixture to steep for 30 - 60 minutes.
 Bring the mixture back to a simmer over medium heat.
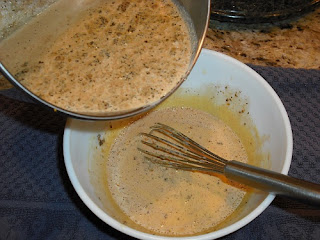
 In a medium bowl, whisk Egg Yolks, Sugar and Salt until the yolks are pale.

 Pour Earl Grey cream into the yolks in a steady stream, whisking constantly.
 Return the raw custard to the sauce pan.

Run the raw custard through the strainer to remove the Orange Zest, Tea leaves and any possible cooked egg bits. (If you used tea from a tea bag, you will need several layers of cheese cloth for straining the tiny bits)
 Place ramekins, or actual pots de creme, in a roasting pan that has been lined with a towel.
 Fill the ramekins/pots with the raw custard.
 Pour enough hot water into the roasting pan to bring the water level half way up the sides of the ramekins/pots.
 If using pots, place the covers on them, if using ramekins, cover the whole pan with foil.
 Bake in the oven for 25-30 minutes, the center should still be a little jiggly.

 When custards are done, remove them from the hot water and place on a cooling rack.
 Once the custards are at room temperature, cover with plastic wrap and place in the refrigerator for at least 2 hours. (if you are using the pots, simply leave the covers on them and move to the refrigerator)
Serve chilled.
So smooth and rich, it puts American Pudding (usually made with cornstarch or gelatin) to shame. Hints of bright orange mellowed with the smooth flavor of "Tea with Creme". Decadent silken lusciousness! That's all I can say.
OK, I could say it was "wicked good" (cause it was) but I don't think that does as much justice to it. LOL
Mangia!!
~~
Technically, this works better if you have the actual "pots de creme" that are what give this custard dessert its name. They are kind of like a demitasse (espresso sized) cup with a lid. But in a pinch, you can use ramekins; which I have have done here, because I only have ONE of these little pots.

Making the custard for pots de creme is just like making the custard for creme brulee. The only real difference is the lack of a crunchy melted sugar top and the fact that it is served in a deep dish rather than a shallow one. The plus side of pots de creme is that lack of a burnt sugar topping allows for more diverse flavorings. As much as I love burnt sugar, even I must admit that it doesn't necessarily go with everything under the sun. Hey, and without the sugar topping, pots de creme actually contains fewer calories than creme brulee. Yet it is still just as smooth, creamy and delicious. I call that a win win.
I already had my heart set on making this, since the weather was so drippy and cold, but I was out of loose leaf tea. Instead of running to the store, I tore open some Earl Grey tea bags that I had in the pantry... bad idea. Tea bags usually contain much finer leaves, so unless you have cheese cloth to filter the custard through (I was out of that as well) then I highly recommend using loose leaf tea.
So the next time the sky is cloudy and gray, add some sunshine to your day and chase those oppressive blues away with Pots de Creme infused with Earl Grey.
Earl Grey Pots de Creme

1/2 cup (118ml) (4 oz) Half and Half
zest of 1 Cara Cara Orange or a Meyer Lemon
2 TB loose Earl Grey Tea leaves (not tea bags, the tea is too fine)
4 large Egg Yolks
1/2 cup (100g) (3.5 oz) Granulated Sugar
Pinch of Kosher Salt
Combine Heavy Cream, Half and Half, Orange Zest and Tea Leaves in a saucepan.


Run the raw custard through the strainer to remove the Orange Zest, Tea leaves and any possible cooked egg bits. (If you used tea from a tea bag, you will need several layers of cheese cloth for straining the tiny bits)


Serve chilled.

OK, I could say it was "wicked good" (cause it was) but I don't think that does as much justice to it. LOL
Mangia!!
~~