I figured, since I just finished touting the healthy deliciousness that is Fennel, I should probably post a recipe that uses something other than the bulb. I mean, there ARE other parts to the plant, and as I stated in Risotto al Finoccho, they are all edible. This particular recipe utilizes the feathery leaves.
Normally, when I cook Italian cuisine, I tend to stay in the northern area of the country. True, I venture down to Lazio, on occasion, and delve into Campania for San Marzano Tomatoes and Mozarella di Bufala. I even dip my toe in Abruzzo for Montepulciano. (which is awesome with lamb by the way) Most of the time, however, I tend to stay around Emilia-Romagna and it's northern neighbors Liguria, Piemonte, Aosta, Lombardia, Trentino, Veneto, and Friuli. Heck, my last Fennel recipe was a risotto and risotto is a Northern Italian dish, at least for the most part. But today, I wanna take a trip south.... WAY south. Across the water. Though it's really not all that much water. The Destination? Sicilia (Sicily). In particular, Palermo. For that is where this dish hails from. Though I have heard it said that the invading Moors are actually responsible for this dish, which is why it contains Currants.
I know this will not be everyone's cup of tea, but I cannot help myself. I LOVE Sardines. They are simply delicious and they're amazingly good for you. Besides being virtually mercury-less, unlike some other long lived fish, sardines are chock-full of Omega-3 fatty acids and loaded with calcium. They're really like health food in a can, I swear. But we aren't done yet. This dish contains Pine nuts as well. Those little nuggets of cholesterol lowering yumminess. Pine nuts are high in Oleic acid (a mono-unsaturated fat which helps reduce LDL and increase HDL production) and rife with Vitamin E (a fat soluble antioxidant). Now once we add in the cancer fighting, anti-inflammatory power for Anethole, from the Fennel, and you have a pasta dish of such healthy proportions, it is truly a fearsome thing to behold.
So this one is for the fish lovers out there.

1/2 cup dried Currants (those would be Zante Currants, black currants are hard to find)
2 oz Fennel leaves (about 3 bulbs worth of fronds, depending on how they are trimmed up)
3/4 cup Olive Oil
1 cup Panko
1/2 cup Pine Nuts
3.5 oz Shallot, minced
5 Anchovy Fillets
3 4-oz cans Sardines (they are about 3 oz after draining)
pinch of Saffron
Salt and Pepper to to taste
1 lb Linguine (or more appropriately Bucatini)
Begin by soaking the Currants in enough hot water to cover them for 15 minutes.
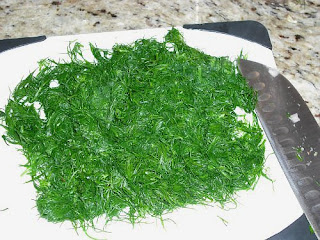
 Bring a pot of salted water to a boil and drop in the fennel "feathers" and blanch for 2 minutes.
 Remove them with a slotted spoon to a cutting board and chop them roughly.
 2 TB Olive oil in a skillet set over medium heat.
 Toast Panko in the hot oil, tossing frequently, until all crispy and golden.

 Remove from the pan and set aside.
 Wipe the pan and toast the pine nuts too.
 Set them aside as well.
 Add 1/2 cup Olive oil to the pan.
 When heated, saute the shallot until soft. (about 5 minutes)
 Add Anchovy fillets and cook, stirring, until they break apart. (about 3 minutes more)
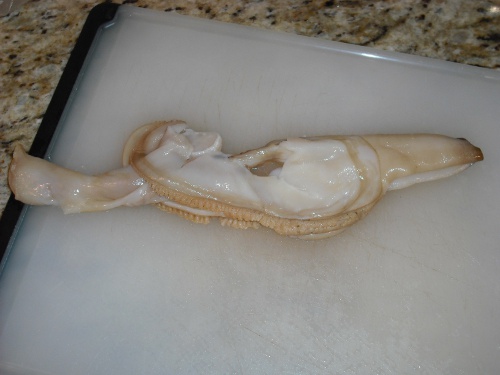
 Add the Sardines and stir them in carefully, you don't want to break them up too much.
 Add the Currants and Fennel, and simmer for 5 minutes.
 Meanwhile, drop the Linguine into the same water you blanched the Fennel fronds in.
 Remove the skillet from the heat and add the Pine Nuts.
 When the pasta is done, quickly remove 1 cup of the pasta water and set aside.
 Drain the Linguine well.
 Pour the Linguine back into the pot and toss with 2 TB Olive oil. (this will help the sauce cling to the pasta)
 Pour the Sardine mixture over the Linguine and toss gently.......
 adding pasta water as necessary until everything becomes well blended and moderately "saucy".
 (I only needed 3/4 cup of the pasta water this time)
 Pour into a warm serving bowl
 Then sprinkle with about 1/2 cup of the toasted Panko.
 Serve with remaining Panko to be used at the diner's discretion.
 And here is the gratuitous extreme close up shot.... :)
 Mangia!!
~~
Normally, when I cook Italian cuisine, I tend to stay in the northern area of the country. True, I venture down to Lazio, on occasion, and delve into Campania for San Marzano Tomatoes and Mozarella di Bufala. I even dip my toe in Abruzzo for Montepulciano. (which is awesome with lamb by the way) Most of the time, however, I tend to stay around Emilia-Romagna and it's northern neighbors Liguria, Piemonte, Aosta, Lombardia, Trentino, Veneto, and Friuli. Heck, my last Fennel recipe was a risotto and risotto is a Northern Italian dish, at least for the most part. But today, I wanna take a trip south.... WAY south. Across the water. Though it's really not all that much water. The Destination? Sicilia (Sicily). In particular, Palermo. For that is where this dish hails from. Though I have heard it said that the invading Moors are actually responsible for this dish, which is why it contains Currants.
I know this will not be everyone's cup of tea, but I cannot help myself. I LOVE Sardines. They are simply delicious and they're amazingly good for you. Besides being virtually mercury-less, unlike some other long lived fish, sardines are chock-full of Omega-3 fatty acids and loaded with calcium. They're really like health food in a can, I swear. But we aren't done yet. This dish contains Pine nuts as well. Those little nuggets of cholesterol lowering yumminess. Pine nuts are high in Oleic acid (a mono-unsaturated fat which helps reduce LDL and increase HDL production) and rife with Vitamin E (a fat soluble antioxidant). Now once we add in the cancer fighting, anti-inflammatory power for Anethole, from the Fennel, and you have a pasta dish of such healthy proportions, it is truly a fearsome thing to behold.
So this one is for the fish lovers out there.
Linguine con le Sarde

1/2 cup dried Currants (those would be Zante Currants, black currants are hard to find)
2 oz Fennel leaves (about 3 bulbs worth of fronds, depending on how they are trimmed up)
3/4 cup Olive Oil
1 cup Panko
1/2 cup Pine Nuts
3.5 oz Shallot, minced
5 Anchovy Fillets
3 4-oz cans Sardines (they are about 3 oz after draining)
pinch of Saffron
Salt and Pepper to to taste
1 lb Linguine (or more appropriately Bucatini)
Begin by soaking the Currants in enough hot water to cover them for 15 minutes.


~~


