I like to play with cookie dough. I am sure this harkens back to my childhood and many hours playing with clay and Playdough. But now that I am all growed up and stuff, I don't make elephants or clowns, I play with the flavor of the dough instead.
This sort of experimentation has brought forth such favorites as Rose Water Sugar Cookies, Green Tea Shortbreads and my ultimate favorite Roasted Garlic and Asiago Shortbread.... On the flip side, it has also spawned more heinous creations such as Bacon Cinnamon Sugar Cookies (too greasy) and Sweet Potato Shortbread (really really). This time I played it fairly safe. I was messing with Sugar Cookies and decided to give them a sort of Pizzelle flavor, thus a little Anise seed. Then on a whim, I decided that a few almonds might be nice. Honestly, the chocolate was an afterthought and I am still not convinced that it necessarily "compliments" the cookies or not. I think White Chocolate might be nice, but it depends on your personal tastes.
Don't be afraid of these cookies. The Anise is very mild since there is no extract being used, just the seeds. They have more of a light "kiss" of Licorice.
 3/4 cup (6 oz) (170 g) Unsalted butter
1/2 tsp Kosher Salt
3/4 cup (5.25 oz) (150g) Granulated Sugar
1/2 cup (2 oz) (55g) Slivered Almonds
1 tsp Vanilla Extract
1 tsp Anise Seeds
2 Large Eggs
2 1/2 cups (11 oz) (312g) AP Flour
optional - 1/3 cup Chocolate Chips
optional - sliced almonds
Beat the Butter, Salt and Granulated Sugar together until fluffy.
 Add Almonds and beat again.
 Add Vanilla Extract and Anise Seeds, then beat yet again, until the seeds are well dispersed.
 Add Eggs, 1 at a time, beating well after each addition to ensure the emulsion doesn't break.
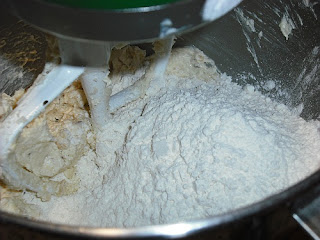
 Add all the flour and stir in slowly to avoid the "puff" cloud.
 Once everything is all nice an homogeneous, turn the dough out onto waxed paper and form a square.
 Wrap it up in the waxed paper and store in the refrigerator for at least 30 minutes, but preferably 1 hour.
Preheat your oven to 350 F degrees, then turn the chilled dough out onto a lightly floured surface.
 Roll to 1/8 inch thick.
 Cut rounds of about 2 1/2 inches.
 Place on a parchment lined baking sheet (or an ungreased AirBake sheet)
 Bake for 10 minutes.
Move the cookies to a rack and cool completely.
 If desired, drizzle with melted Chocolate and sprinkle with sliced Almonds.

Mangia!!
~~
This sort of experimentation has brought forth such favorites as Rose Water Sugar Cookies, Green Tea Shortbreads and my ultimate favorite Roasted Garlic and Asiago Shortbread.... On the flip side, it has also spawned more heinous creations such as Bacon Cinnamon Sugar Cookies (too greasy) and Sweet Potato Shortbread (really really). This time I played it fairly safe. I was messing with Sugar Cookies and decided to give them a sort of Pizzelle flavor, thus a little Anise seed. Then on a whim, I decided that a few almonds might be nice. Honestly, the chocolate was an afterthought and I am still not convinced that it necessarily "compliments" the cookies or not. I think White Chocolate might be nice, but it depends on your personal tastes.
Don't be afraid of these cookies. The Anise is very mild since there is no extract being used, just the seeds. They have more of a light "kiss" of Licorice.
"Licorice" Sugar Cookies

1/2 tsp Kosher Salt
3/4 cup (5.25 oz) (150g) Granulated Sugar
1/2 cup (2 oz) (55g) Slivered Almonds
1 tsp Vanilla Extract
1 tsp Anise Seeds
2 Large Eggs
2 1/2 cups (11 oz) (312g) AP Flour
optional - 1/3 cup Chocolate Chips
optional - sliced almonds
Beat the Butter, Salt and Granulated Sugar together until fluffy.


Preheat your oven to 350 F degrees, then turn the chilled dough out onto a lightly floured surface.


Move the cookies to a rack and cool completely.


Mangia!!
~~


