Showing posts with label Candy. Show all posts

Wednesday, December 18, 2013

Seeing Red - Red Walnut Divinity

Nothing says the holidays quite like Walnuts.  They lend crunch to Fruit Cake and Brownies, speckle Divinity and Fudge and flavor Baklava and Nut Rolls.  In fact, it should be illegal to have Christmas without Walnuts. 

Historically, at least in the United States, we have had a choice between the mild transplanted "English" Walnut (which are really Persian) and the stronger flavored "native to the US" variety known as the "Black" Walnut.  But no more, for California has done it again.  They have successfully begun producing RED Walnuts.

Don't freak out, it's not a GMO, nor is it a gimmicky artificially colored food product.  The interior husk REALLY is Red.  From the outside, you would not be able to tell the difference between the standard English/California/Mission/Persian Walnut and the new Red Walnut (which is either a Livermore or a Yolo) developed at UC Davis by grafting a Persian red skinned variety to the more common English (insert litany of AKAs here) Walnut. 

Unlike "English" Walnuts, which take 2-3 years to begin producing, these red varieties can take as long as 8 before producing a significant crop.  Thus, those that were planted over a decade ago are now beginning to bear "fruit" as it were.

(Black Walnut, English/Mission/California/Persian Walnut, Red Walnut)

The harvest is still low, when compared to the massive quantities of English Walnuts produced by California. Heck, very low when compared to the copious amounts of nuts that are produced by California in general.  Texas, New Mexico and Georgia have their Pecans.  While Oregon and, to a lesser extent, Washington have their Hazelnuts.  Even though Hawaii is the land of the Macadamia nut.  It is California's harvest of Walnuts, Pistachios and Almonds along with a few Pecans, Macadamias and Hazelnuts as well, which culminates into 90% of the United States yearly nut crop.

Which only proves that California is seriously full of nuts.  I'm just sayin'

So what do "Red" Walnuts taste like?  To me, they taste more "nutty", almost like they have already been lightly toasted.  Here is the interesting thing though, they are lacking in that bitter tannic bite that English (AKA litany) and Black Walnuts have.  Thus, I think the "nut" flavor is more pronounced simply because they aren't as bitter as common Walnuts.  

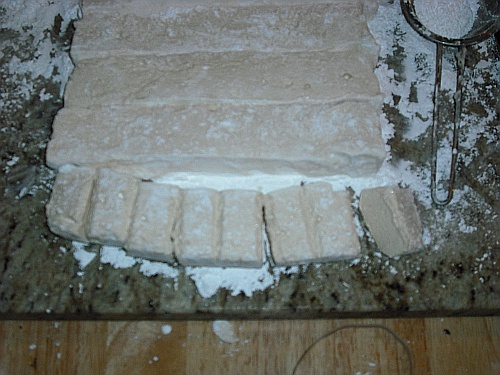
I chose to use the few I was able to procure in a batch of Divinity.  I have covered Divinity several times before, both Lavender and with Black Walnuts, so I am not going to run through the procedure again in this post.

I am, however, going to show off my vintage Betty Furness "Westinghouse" thermometer set.  (I wonder if she's fictitious like Betty Crocker)


And show a picture of the addition of chopped Red Walnuts to the Candy mixture... Exciting, huh?

To be honest, though I was happy with the end result, I think I should have left my Red Walnuts in larger chunks.  They really didn't show up in the finished Divinity, which kind of bummed me out.  (and why I posted the picture of me adding them to the candy batch --  they really are in there)

I was hoping for a nice punch of red within the pristine whiteness of the candy. (sigh) Oh well.

The flavor was delicious and that is really the important thing.

So check them out and give them a try.

Mangia!!
~~

Wednesday, February 15, 2012

Eating Paste - Almond Paste

Seriously, if the paste I used in Kindergarten tasted like this, I would have been a paste eater!

Almond Paste and Mazipan are often confused.  While they are closely related, they are two very different things.  The primary difference is the sugar content.  Almond Paste is pretty much a mixture of 45-50% Almonds and 50-55% Sugar.  That is it.  Maybe little bitter almond extract but it's not required.  Marzipan, on the other hand, usually contains over 70% sugar.  What it really boils down to is that Almond Paste is the key 'ingredient' to making Marzipan along with additional sugar, and sometimes egg whites.

I have purchased Almond paste many times over the years.  Odense and Solo being two of the biggest.  But recently, when I started computing how much it was costing me, I was slightly horrified.  Odense usually comes in a 7 oz tube for about $8.99 while the Solo can, being 8 oz, usually sells for $10 or more.  Maybe it is the part of the country I live in; I don't know.  Suffice it to say, it has become extremely cost prohibitive.  When this happens, I usually resort to making my own.

Luckily, Almond Paste is extremely easy to make.  You don't need any special equipment, other than a food processor and a candy thermometer.  As far a "skills" go, well if you have made fudge, then you can make Almond Paste... If you have ever made boiled Fondant then you can make Almond Paste.  For all almond paste really is, a boiled fondant that contains finely ground nuts.

So what was the final verdict?  The flavor is the same, though it IS a little stiffer than store bought due to lack of "Glycerin" and other additives.  As far as price goes... I spent $4.03 on ingredients.  I am sure if I had blanched my own almonds instead of buying pre-blanched, slivered almonds, the cost would have been about $1 less.  But I got 1 lb of Almond paste for $4.03...  That is a significant difference in price; .25 cents per oz. as opposed to $1.25 per oz. or 1/5th of the price.  I no longer have to break the bank to make Banket. THAT makes me happy.  As far as time from start to finish... It took all of 30 minutes, and 15 of that was waiting for the almonds to cool after I toasted them.  THAT makes me ecstatic.

Almond Paste

8 oz (227g) Blanched Slivered Almonds
7.1 oz (200g) (1 cup) Granulated Sugar
2 TB Honey (mild flavored such as Orange Blossom or Vetch)
2 oz (65ml) (1/4 cup) Water
3 TB Confectioners' Sugar
1/4 tsp Almond Extract (be sure it's made with bitter almonds)

Spread the slivered Almonds evenly on a baking sheet.

Toast the Almonds for 6 minutes at 350 degrees. (Lightly toasted only... Cause you will be adding really hot syrup which will also "toast" the nuts)
Remove from the oven and allow to cool for 15 minutes.

Meanwhile, combine Sugar, Honey and Water in a small saucepan.

Place over medium flame and stir until the sugar dissolves.
Once the syrup begins to boil, insert a thermometer.

Cook the syrup to soft ball stage or 238 F (114 C) degrees.

While you are waiting for the syrup, place the cooled Almonds into the bowl of your food processor and pulse them a few times to break them up a little bit.

Add the Confectioners' sugar.

Process the Almonds and Confectioners' Sugar until the nuts are finely ground but have not begun turning into Almond butter yet. (While Almond Butter is tasty, this wont work if you grind them that fine)  The Cornstarch in the Confectioners' sugar will absorb some of the oil and allow for slightly longer grinding before the "Butter" stage occurs.

Once the syrup is up to temperature, turn the processor back on and slowly drizzle the hot syrup into the almonds through the feeder tube.

Continue processing after adding the syrup until a "dough" begins to form in the bowl.

Turn the dough out onto a piece of waxed paper (it will be slightly oily) and begin to knead it (careful cause it's hot)

Once it's fairly smooth, add Almond extract

Knead the extract into the paste and continue kneading until the paste begins to stiffen, but is nice and smooth.

Form into a disk, and wrap in the waxed paper, followed by a secure wrapping of plastic wrap; store in the refrigerator for a couple hours.

I like to form mine into 4 oz chunks and store in a plastic container in the freezer for up to 6 months. (Because I have to keep it out of sight so I don't keep picking little pieces off and eating them)

And there you have it...  From here, you can make several desserts, such as Almond Pastry Cream, Marzipan (by adding Confectioners' sugar and an egg white), Bear Claws, Almond Croissants and Banketstaaf; or you can make the Tri-corn cookies (Parson's Hats) I have planned for later.

Mangia!!
~~

Friday, December 9, 2011

The Taste of Christmas - Grandma's "Almond Roca"

A Christmas family tradition since... hmmmm... Well, at least since *I* was born, but probably longer.  I honestly cannot remember a Christmas that didn't include this most decadent of all Christmas candies, made with love by Grandma Reva.   OK, there were many Christmases in San Diego that were devoid of this holiday treat from grandma's hearth, but now is not the time to ruminate upon sad times.  LOL

I have actually tried to make this before, when I was living in San Diego.  After all, it's just not Christmas without it.  All my attempts ended in chewy toffee, or slightly sugary toffee.  Basically, a massive failure.  Come to find out, after discussing this with grandma, Almond Roca/English Toffee is REALLY touchy about humidity.  Candy usually IS touchy when the air is damp, but this one is particularly finicky.  You would think that San Diego would be dry enough, being coastal dessert and all, but alas, the humidity is still on the high side during the December months.  So, repeat after me... "Dry weather is Almond Roca's friend"

When making Almond Roca, there is another issue to be aware of besides the humidity...  There is an entire POUND of butter in this stuff and that equates to a lot of milk protein.  Milk proteins scorch very easily.  Thus, though it is usually frowned upon, you MUST stir this candy constantly during the cooking process to avoid any scorched flavors.  You will also need to use a good quality butter as well.  Oh, I am not talking about the fancy cultured butter or anything like that, but you need to be aware of the butterfat/water ratio.  The more water means a longer boiling time and a longer boiling time leaves more time for the candy to scorch.

Why is there so much butter in the toffee?  Well, aside from the richness it imparts to the candy, there is the matter of the sugar crystallization.  Toffee is basically a Hard Crack candy, like Peanut Brittle or Rock Candy.  Brittle is usually a little more tender due to the carbon dioxide gas produced by adding baking soda at the end of the cooking process, right before pouring.  The little bubbles of gas interfere with the sugar crystal formation, forcing smaller crystals to form and thus making the candy more "brittle" than rock candy, which is called rock candy for a reason... It's hard as a rock.  In order to produce a toffee that doesn't break your teeth, you add copious amounts of butter fat.  The fat interferes with the formation of the the sugar crystals, just as the carbon dioxide gas does in Peanut Brittle. The end result is a much more tender, yet crisp candy that isn't quite so hard on your fillings and crowns.  ;)

I have done my best to explain the process, but there are certain things that are very difficult to convey.  I have made 3 batches today, and they all finished at different temperatures.  There is a particular color of brown that the syrup changes to when it is ready... anywhere from 298 to 305 degrees.   I took 302 F as an average of the temperatures.  Hard Crack stage is at 300 F.  So it's a pretty safe bet, that if you cook it to 302 F, it will be fine.  Just don't go past 305 F.  Not only will the sugar begin to burn but the milk proteins from the butter will definitely burn.... 

Grandma's Almond Roca

(Chocolate covered English Toffee)

2 cups (453g) (16 oz) Unsalted Butter (Yeah, this ain't no diet food)
1/4 cup (60ml) (2 oz) Water
1 1/4 tsp Kosher Salt
1/4 tsp Cream of Tarter (or 1 tsp Vinegar)
2 cups (400g) (14.2 oz) Granulated Sugar
2 TB Lyle's Golden Syrup or light Corn Syrup (but Lyle's works better)
1 1/3 cup (150g) (5.2oz) Slivered Almonds
12 oz (340 g) Chocolate of your choice (I make 3 batches and cover two in Milk and the third in Dark)
2 oz (60g) ground sliced Almonds

Line a 15 x 10 baking sheet (the same size I use for Grandma's pumpkin roll) with parchment paper or apply a thin coating of vegetable oil.

Melt the butter in a heavy bottomed saucepan over medium-low heat.

Mix Water, Salt and Cream of Tarter together in a small pitcher, making sure the salt is dissolved completely.

When the Butter has melted completely, add Sugar....

and the Water mixture and stir to combine.

Add the Golden Syrup and stir some more (this is just the beginning, you are going to be stirring A LOT during this process)

Stir until the mixture comes to a boil.

Add the candy thermometer, making sure it is not touching the bottom of the pan, and continue stirring.

Make sure you do NOT increase the temperature past medium, or your risk of scorch increases exponentially.  Just be patient, and continue stirring...

The syrup will foam up a lot at first, then it will settle back down and slowly change from beige yellow to a rich golden brown....

When the thermometer reaches 295 F (146 C) degrees, add the slivered almonds and stir them in.

Continue stirring as the temperature drops a little, down to about 285 F (140 C), just keep on cooking it over medium-low heat, stirring constantly...

The temperature will begin to climb again after a couple minute...  Watch closely until it reaches 302 F (150 C) degrees.

Remove from the heat and pour the candy into the prepared pan... Spreading it to the edges with your wooden spoon.

Allow it to cool and "set".
Meanwhile, scrap the pan and save those bits for yourself, cause you need to replenish your energy from all that stirring.  :)  

After about 20 minutes, you can score it if you like, but I prefer to just break it apart later. (it snaps fairly easily.  The chunks may be a little irregular, but that is part of the charm of homemade candy)
Once the toffee has cooled and set completely, melt 6 oz (170 g) of the chocolate.

Pour onto the toffee slab and spread with an offset spatula until the entire side is covered.

Sprinkle lightly with 1 oz (30 g) of broken sliced almonds.

Allow to set, then flip the slab over and repeat...

Melt remaining chocolate, spread remaining chocolate, sprinkle with remaining almonds.

Once the second side has set, you can simply break the slab apart... And enjoy.

mmmmmm Rich and buttery!  Yep, tastes JUST like Christmas.

Mangia!!
~~

Monday, December 5, 2011

Hot Cocoa's Best Friend - Honey Marshmallows

I have attempted to make marshmallows many many MANY times.  Each time, the results have been a disaster. I went so far as to "blow up" my Oster Kitchen center in my quest to attain the perfect marshmallow.  In a way, it's because of marshmallows that I now own a Kitchen Aid mixer.  LOL
Alas, even with a KA, I still have not been able to achieve satisfactory marshmallow-dom. 

That is, until now. 

Thanks "bee" to The Pioneer Lady's Country Kitchen, for her Honey marshmallows are not only right up my ally (being made with honey) they come out perfect every time!

My 4 year long quest has come to a close and I have attained a state of Marshmallow Nirvana.  Now if you will excuse me, I must go make some Hot Cocoa to enjoy my puffy white pillows of deliciousness.  :)

Honey Marshmallows

Oil for the baking dish and the saucepan
Cornstarch to dust baking dish
1 TB unflavored Gelatin
a pinch of Kosher Salt
236ml (8oz) (1 cup) Water, divided
200g (1 cup) Granulated Sugar
236ml (8 oz) (1 cup) Honey (or 315g or 11.1oz depending on how you prefer to measure it)
Confectioners' Sugar for dusting marshmallows (about 1 cup-ish or 125 to 150 ish grams)

Grease an 9 x 9 pan and dust with cornstarch, then set aside.

In the bowl of your mixer, pour 118ml (4oz) (1/2 cup) of the Water and sprinkle the Gelatin over the surface to bloom.

Sprinkle with a pinch of Salt.

In a small saucepan, combine the remaining Water with Sugar and Honey.

Set this over medium flame and cook, without stirring, until it reaches Soft-Ball stage or between 234F and 240F (112C-115C).

Remove the syrup from the flame and pour over the bloomed Gelatin, stirring well to combine.

Allow this to cool until it has the consistency of a "raw egg white". I know that is kid of vague, but the temp varies slightly somewhere around 80 F (26 C) degrees

Then begin whipping the mixture with your whisk attachment (or rotary beater if you don't have a whisk) until stiff peaks form.

Pour into the prepared baking dish and allow the mixture to firm up and dry out for 8-12 hours, uncovered. (Yes, I started these yesterday evening and finished them first thing this morning)

Turn out onto a flat surface that has been liberally dusted with Confectioners' Sugar. (you may need to loosen the sides with a frosting spatula)

Cut into 1-inch strips, with a Confectioners' Sugar dusted knife, and roll each piece in more Confectioners' Sugar.

Cut each strip into 1 inch pieces.

Dredge again in Confectioners' Sugar.

Lay finished marshmallows on a piece of waxed paper and allow them to completely dry for an additional hours or so.

Turn them over and dust with Confectioners' Sugar, again.  Let them dry for 1 hour longer. (you will notice that the exposed sides have begun to form a dry "crust" on them.  This is a good thing)

Once they are completely dry, dust all the marshmallows again in Confectioners' Sugar before storing in an air tight container between sheets of waxed paper.

NOW is the time to make some Hot Cocoa (Not Hot Chocolate, actual Hot Cocoa)

Mangia!!
~~