I have been sitting on this for a while because it doesn't seem to matter how many re-writes I do, it just never seems to be quite "right". I guess sometimes it's best to simply grit ones teeth, rip the band-aid off really quickly, scream (if necessary) and keep going forward. Whew! So here goes; slightly disjointed though it may be....
On October 9th, 2012 I lost my grandmother. Reva Helen Christopherson (Bottomiller) to be exact. Mother of 4 (my mother being one of them), Grandmother of 13, Great-Grandmother of 16.
My memories? Well, aside from being chased with a wooden spoon because I chipped the lid of one of her L E Smith glass apothecary jars while trying to sneak cookies; there was her love of poodles, both toy and standard. Grandma always had at least 1 poodle and as many as 3 at one time. April, Amber, Jasper, Rusty, Maggie and Spice being the ones that I remember. She was an avid collector of bells and I use to love to get into her bell cabinet when I was little and listen to all the different rings that came from glass, silver, brass and even wooden ones.
She was the guru of candy making and the goddess of cakes, master of the cinnamon roll and ace of cookies. There was always some delicious treat awaiting when anyone visited. Heck, my cousin Jeremy and I would ride our dirt bikes from Lambert street, out near the cherry orchards on the eastern edge of The Dalles, past Brewery Grade and through Dry Hollow to visit grandma. As soon as we walked through the door we would be greeted with potato chip cookies, coconut cake or cinnamon rolls. Every Halloween we sat on pins and needles waiting for Marshmallow Popcorn Balls. Every Christmas we eagerly awaited grandma's almond roca, divinity, rocky road, fudge and a pumpkin roll. Grandma simply loved to bake and she did it extremely well.
She won several ribbons and awards over the years for her cake baking prowess. But even though her silver cake plate trophy was for a cherry cake at the Cherry Harvest Festival, the cakes that I always remember were her Angel Food Cakes. They were always so unbelievably tall, compared to any other angel food cakes I had ever seen. But grandma just seemed to have some special magical talent when it came to egg whites. My personal favorite, of all her Angel Food cake permutations, was her uber-secret Mocha Angel Food Cake. Once I moved to San Diego, I asked her for the recipe. She made no bones about the fact that it was a secret recipe and that I was not to share it with anyone. EVER! Grandma was really big on sharing recipes, so if she said it was a secret then it really was a secret. Like "11 herbs and spices" secret. Remembering the wooden spoon on my backside when I chipped the lid on her apothecary jar, I have always respected her edict of secrecy over this cake.
Even after the advent of the world wide web and being able to research variations on Angel Food that were posted and shared by other individuals (some of which are identical ingredient-wise) I have respected grandma's wishes. I have posted umpteen recipes on BakeSpace and spent a little over 4 years writing this blog, and still, I have never shared the recipe with anyone other than family members.
In September of last year, when grandma in the hospital the last time, I got the nerve up to asked if she minded if I wrote a blog post about her secret Mocha Angel Food Cake. This time, she gave me the OK. So, now that I have finally been able to bring myself to bake one, and I have been released from my vow of secrecy, I can share with the world the wonder that is my grandmother's Mocha Angel Food Cake.
 I have been making this cake for over 2 decades now, but my first 5 attempts were utter failures. Well, they were failures in my eyes at least. None of them were as light and airy as grandma's were, and they were always vertically challenged. Sure, they were all passable, and no one else really knew the difference. Most people have only eaten white angel food cake, so when presented with one tasting of chocolate and coffee, there were no criticisms on height. I followed all the instructions to the letter, but it still took awhile before I achieved the vertical success that grandma always did.
Oh, I put my scientific mind to work on the issue. I read all about egg whites and studied the denaturing of albumen proteins and how it is affected by acidification. Tried electric hand mixers fitted with whisks, temperature gauges and stand mixers in sterilized stainless bowls. Bought copper bowls, unfiltered apple cider vinegar and ice cream salt. Checked pH levels of several natural cocoa powders and instant coffees. Folded the flour in with natural rubber, wood and silicon. What did I learn from all this?
That this, (though a balloon whisk will serve you just as well)
 and this. (be it copper, glass or stainless steel)
 are all you need to make a beautiful Angel Food cake. No amount of modern gadgetry will serve you as well as a good whisk, a clean bowl and a little elbow grease. Through a single recipe, my grandmother taught me a very important lesson, though it took me years to catch on. It's the reason I tend to beat egg whites and heavy cream by hand, why I work butter into flour with my fingers for pie dough. You should play with your food. Really get your hands in there and feel your ingredients. It is the human touch that brings the best results.
A recipe is simply a set of instructions, but in the hands of a passionate baker, it comes to life.
 1 cup sifted Cake Flour
1 1/2 cups Confectioners' Sugar
1/4 cup Natural Cocoa Powder (not alkalized)
2 tsp Instant Espresso Powder (or 1 TB Folger's Crystals, crushed to a powder)
1 1/2 cups Egg Whites, room temperature (9-10 large Egg Whites)
1 tsp Kosher Salt
1 1/4 tsp Cream of Tarter (especially if you are using a glass or stainless bowl)
1 cup Granulated Sugar
1 tsp Vanilla Extract
1 tsp Almond or Hazelnut Extract
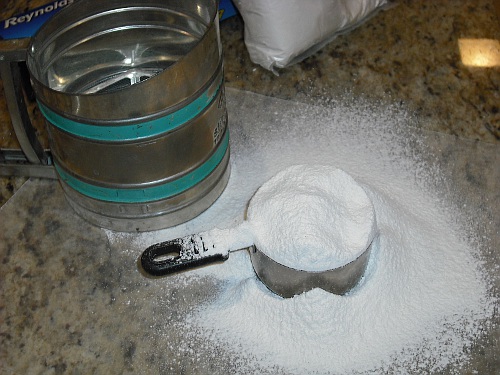
Sift the Cake Flour into a 1 cup measure and cut to level. (You can skip this step if you have a scale, it comes out to 100 grams)
 Place Cake Flour back in the sifter along with Confectioners' Sugar, Cocoa Powder, and Espresso Powder.
 Sift 4 times, back and forth between 2 sheets of waxed paper.
 (this is not so much to aerate the flour as it is to make sure that the ingredients are WELL mixed together - It needs to be uniformly mixed)
 Once you have finished your final sifting, go ahead and move the dry ingredients back into the sifter again.
Separate the eggs whites into a measuring pitcher to ensure you have the proper quantity of whites. (save the yolks for some other purpose, like Creme Brulee.)

 If you are using a copper bowl, like I do, add a little coarse salt and a tablespoon or two of vinegar and wipe well with a paper towel to activate the copper bowl. (if you are using a stainless steel or glass bowl, never plastic, make sure they are oil free, and dry)
 Place Egg Whites in the bowl and begin to beat them with a hand whisk (I swear that it works better that way, but you can use an electric mixer if you like)
 When the Whites become frothy, sprinkle the Cream of Tarter over the surface and continue whisking.
 When the Whites have reached soft peaks, begin sprinkling the Granulated Sugar over the whites 1 TB at a time, whisking about 15-20 strokes between each addition. (This is why I do it by hand, it gives me more control and allows enough time for adding the sugar without beating the egg whites to stiff peaks too soon)
 Once you have added all the Granulated Sugar, add the extracts and keep whisking until the whites become stiff and pearlescent
 (Your will feel the difference in the movement of the whisk through the whites, they literally become stiffer in feel)
The egg whites will be pearlescent when you are done, not glossy, there isn't enough sugar for them to really become glossy like in a normal meringue.
 Now the FUN begins.
Preheat the oven to 325F degrees.
 Grab your biggest silicon spatula and begin folding in the dry ingredients by sifting 1/4 cup over the meringue at a time, folding well before the next addition.
 Don't leave any dry spots.
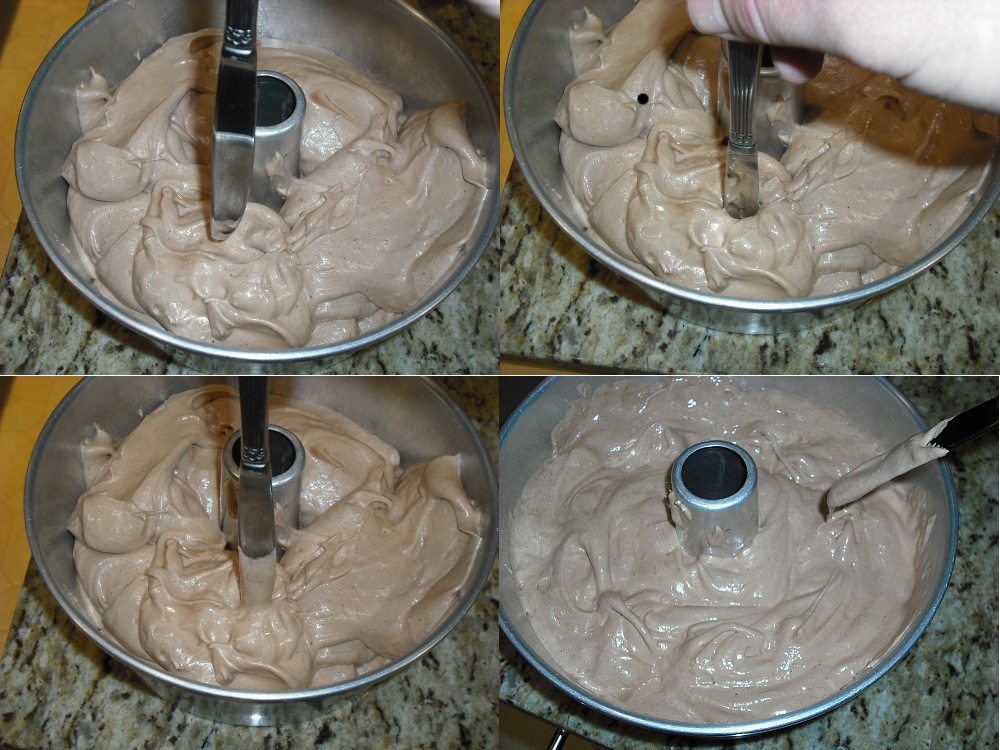
 Once the mixture is completely homogeneous, gently spoon it into a 10 inch tube pan. (Silicon sucks and non-stick is a joke, just a good old fashioned aluminum tube pan)

 Grab a clean butter knife and cut straight down into the batter and draw the knife back up. (This removed any large bubbles in the batter from spooning it into the pan)
 Move the pan into the oven and bake for 40-50 minutes. (You will notice that towards the end, the cake will stop rising and will actually sink ever so slightly. This means that it has "set" and is ready to leave the oven.)
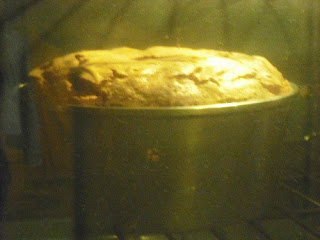 Immediately invert the pan onto the counter so it can finish cooling and setting without sinking under it's own weight (If the pan doesn't have "feet" then you may need to set it over a bottle)
 Allow the cake to cool completely.
Take a sharp knife and cut around the outside and around the center tube.
 Flip the cake, pan and all, onto your chosen serving dish (or Tupperware cake taker), then remove the outer ring of the pan.
 Carefully cut the bottom of the pan away from the cake, and let it fall onto the serving plate.
 And there you have it.
 One beautifully 4 1/2 inch tall Mocha Angel Food Cake.
 I think my grandmother would be proud.
It may sound a little cheesy, but I have no doubt that Gabriel, Uriel, Michael and Raphael are keeping her busy with their requests for Angel Food Cakes. Knowing my grandmother, she is more than happy to oblige, cause they are all too skinny. :)
Mangia!!
~~
On October 9th, 2012 I lost my grandmother. Reva Helen Christopherson (Bottomiller) to be exact. Mother of 4 (my mother being one of them), Grandmother of 13, Great-Grandmother of 16.
My memories? Well, aside from being chased with a wooden spoon because I chipped the lid of one of her L E Smith glass apothecary jars while trying to sneak cookies; there was her love of poodles, both toy and standard. Grandma always had at least 1 poodle and as many as 3 at one time. April, Amber, Jasper, Rusty, Maggie and Spice being the ones that I remember. She was an avid collector of bells and I use to love to get into her bell cabinet when I was little and listen to all the different rings that came from glass, silver, brass and even wooden ones.
She was the guru of candy making and the goddess of cakes, master of the cinnamon roll and ace of cookies. There was always some delicious treat awaiting when anyone visited. Heck, my cousin Jeremy and I would ride our dirt bikes from Lambert street, out near the cherry orchards on the eastern edge of The Dalles, past Brewery Grade and through Dry Hollow to visit grandma. As soon as we walked through the door we would be greeted with potato chip cookies, coconut cake or cinnamon rolls. Every Halloween we sat on pins and needles waiting for Marshmallow Popcorn Balls. Every Christmas we eagerly awaited grandma's almond roca, divinity, rocky road, fudge and a pumpkin roll. Grandma simply loved to bake and she did it extremely well.
She won several ribbons and awards over the years for her cake baking prowess. But even though her silver cake plate trophy was for a cherry cake at the Cherry Harvest Festival, the cakes that I always remember were her Angel Food Cakes. They were always so unbelievably tall, compared to any other angel food cakes I had ever seen. But grandma just seemed to have some special magical talent when it came to egg whites. My personal favorite, of all her Angel Food cake permutations, was her uber-secret Mocha Angel Food Cake. Once I moved to San Diego, I asked her for the recipe. She made no bones about the fact that it was a secret recipe and that I was not to share it with anyone. EVER! Grandma was really big on sharing recipes, so if she said it was a secret then it really was a secret. Like "11 herbs and spices" secret. Remembering the wooden spoon on my backside when I chipped the lid on her apothecary jar, I have always respected her edict of secrecy over this cake.
Even after the advent of the world wide web and being able to research variations on Angel Food that were posted and shared by other individuals (some of which are identical ingredient-wise) I have respected grandma's wishes. I have posted umpteen recipes on BakeSpace and spent a little over 4 years writing this blog, and still, I have never shared the recipe with anyone other than family members.
In September of last year, when grandma in the hospital the last time, I got the nerve up to asked if she minded if I wrote a blog post about her secret Mocha Angel Food Cake. This time, she gave me the OK. So, now that I have finally been able to bring myself to bake one, and I have been released from my vow of secrecy, I can share with the world the wonder that is my grandmother's Mocha Angel Food Cake.

Oh, I put my scientific mind to work on the issue. I read all about egg whites and studied the denaturing of albumen proteins and how it is affected by acidification. Tried electric hand mixers fitted with whisks, temperature gauges and stand mixers in sterilized stainless bowls. Bought copper bowls, unfiltered apple cider vinegar and ice cream salt. Checked pH levels of several natural cocoa powders and instant coffees. Folded the flour in with natural rubber, wood and silicon. What did I learn from all this?
That this, (though a balloon whisk will serve you just as well)


A recipe is simply a set of instructions, but in the hands of a passionate baker, it comes to life.
Mocha Angel Food Cake

1 1/2 cups Confectioners' Sugar
1/4 cup Natural Cocoa Powder (not alkalized)
2 tsp Instant Espresso Powder (or 1 TB Folger's Crystals, crushed to a powder)
1 1/2 cups Egg Whites, room temperature (9-10 large Egg Whites)
1 tsp Kosher Salt
1 1/4 tsp Cream of Tarter (especially if you are using a glass or stainless bowl)
1 cup Granulated Sugar
1 tsp Vanilla Extract
1 tsp Almond or Hazelnut Extract
Sift the Cake Flour into a 1 cup measure and cut to level. (You can skip this step if you have a scale, it comes out to 100 grams)


Separate the eggs whites into a measuring pitcher to ensure you have the proper quantity of whites. (save the yolks for some other purpose, like Creme Brulee.)


The egg whites will be pearlescent when you are done, not glossy, there isn't enough sugar for them to really become glossy like in a normal meringue.

Preheat the oven to 325F degrees.


Take a sharp knife and cut around the outside and around the center tube.


It may sound a little cheesy, but I have no doubt that Gabriel, Uriel, Michael and Raphael are keeping her busy with their requests for Angel Food Cakes. Knowing my grandmother, she is more than happy to oblige, cause they are all too skinny. :)
Mangia!!
~~
Dedicated to my beloved Grandma Reva
February 23rd, 1926 - October 9th 2012


