This might seem like a slightly odd thing for me to post about. I mean who doesn't know how to make Rice Krispie treats, right? But I discovered something interesting.... Surprisingly, there are conflicting recipes out there for even the basic form. I was flabbergasted. Especially since I thought the recipe I had was from the back of the Rice Krispie box... Or at least it use to be when I was a kid, I think. I am confused now.
OK, the whole thing started with the fact that I am not really a cereal eater, cause I don't drink milk.... BUT, I still had this huge amount of Rice Krispies left over from making the Crispy Almond Butter Balls. SO in an effort to reduce the amount of space being utilized in my pantry, I decided to throw some together. Which was all well and good until I realized, upon noticing the recipe on the back of the Rice Krispie box, that
A. It called for 10 oz of marshmallows... Well Kraft's Jet Puffed marshmallows are sold in a 16 oz package, both the large and miniature ones. Hmmmmmmmm Western Family brand's regular size come in a 10.5 oz bag and Campfire regular size are in a 10 oz bag, but the Miniatures are a 10.5 oz bag.
B. The box said that you can do this in a microwave... Huh? That seemed a little odd to me, cause marshmallows expand to an alarming size when nuked. That sure didn't seem safe to me. And it only takes about 5 minutes on the stove... Funny, according to the microwave directions, it takes 5 minutes too... Hmmmmmmm
C. They were only calling for 3 TB of butter. That seems like such a drop in the proverbial bucket. I use at least 4 TB and then more to butter the dish, as well as more for rubbing my hands down for pressing... :) (Mainly because I have tried using the waxed paper method, but it still sticks)
Another thing that puzzled me deeply was that it stated that 40 marshmallows was 10 oz. I am sure that someone in a test kitchen somewhere performed some brilliantly complex calculations, factoring in the gravitational effects when Mars is in perihelic opposition, to conclude the standard weight of a Marshmallow. I greatly salute their efforts. Now I wonder if they calculated the average air-speed velocity of an unladen swallow? European, of course. ;) A hem...
My findings however - cause you KNOW that I just HAD to check it out... ;) - are that Campfire Marshmallows weight slightly less... Or at least they did today. Maybe the moon is in Apogee and tidal forces are low or it could be a previously unknown effect of global warming. ;)
Either way, it takes about 44 normal sized Campfire Marshmallows to equal 10 oz. This means that if you used 40 Marshmallows, you would only have 9.09 oz. Oh, and the miniatures...? 4 cups is not 10 oz, it's 10.5 which is fine, cause that is how many I use.
The only thing that was consistent between the recipe on the cereal box, the recipe on the marshmallow package and the one that I have always used was the amount of Rice Krispies themselves.... 6 cups. YAY! I found something we all agree on.
This is the dawning of the Age of Aquarius!!
 4 oz unsalted Butter - Plus 2 TB more; divided
10.5 oz (298 g) bag of Campfire Miniature Marshmallows (Basically the whole bag)
1/4 tsp Kosher Salt
6 Cups (5.5 oz) (162 g) Rice Krispies or other crisped rice cereal
 First, use 1 TB unsalted Butter to rub down a 12 x 7 inch baking dish.
 Melt the 4 TB butter in a large saucepan over medium flame. (about 3 minutes unless at room temp)
 Add the Mini-Marshmallows and stir constantly until melted. (about 2 minutes)
 Stir in Kosher Salt.
 Add Rice Krispies and fold until well coated.
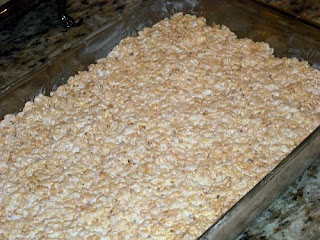
 Dump the mixture into the prepared baking dish and grease your hands up with the remaining TB of butter and press the mixture evenly into the dish.
 Let sit at least 20 minutes to cool and harden.
 Cut into 2 inch pieces. (with a pizza cutter)
 Then just TRY to not sit and eat the whole pan by yourself. I have a hard time resisting the Sweet buttery salty crunch. Mmmmmmm Truly a comfort food for me, from my earliest childhood memories.....
Harmony and understanding
Sympathy and trust abounding
No more falsehoods or derisions
Golden living dreams of visions
Mystic crystal revelation
And the mind's true liberation --- Aquarius...... Aquarius....
Mangia!!
~~
OK, the whole thing started with the fact that I am not really a cereal eater, cause I don't drink milk.... BUT, I still had this huge amount of Rice Krispies left over from making the Crispy Almond Butter Balls. SO in an effort to reduce the amount of space being utilized in my pantry, I decided to throw some together. Which was all well and good until I realized, upon noticing the recipe on the back of the Rice Krispie box, that
A. It called for 10 oz of marshmallows... Well Kraft's Jet Puffed marshmallows are sold in a 16 oz package, both the large and miniature ones. Hmmmmmmmm Western Family brand's regular size come in a 10.5 oz bag and Campfire regular size are in a 10 oz bag, but the Miniatures are a 10.5 oz bag.
B. The box said that you can do this in a microwave... Huh? That seemed a little odd to me, cause marshmallows expand to an alarming size when nuked. That sure didn't seem safe to me. And it only takes about 5 minutes on the stove... Funny, according to the microwave directions, it takes 5 minutes too... Hmmmmmmm
C. They were only calling for 3 TB of butter. That seems like such a drop in the proverbial bucket. I use at least 4 TB and then more to butter the dish, as well as more for rubbing my hands down for pressing... :) (Mainly because I have tried using the waxed paper method, but it still sticks)
Another thing that puzzled me deeply was that it stated that 40 marshmallows was 10 oz. I am sure that someone in a test kitchen somewhere performed some brilliantly complex calculations, factoring in the gravitational effects when Mars is in perihelic opposition, to conclude the standard weight of a Marshmallow. I greatly salute their efforts. Now I wonder if they calculated the average air-speed velocity of an unladen swallow? European, of course. ;) A hem...
My findings however - cause you KNOW that I just HAD to check it out... ;) - are that Campfire Marshmallows weight slightly less... Or at least they did today. Maybe the moon is in Apogee and tidal forces are low or it could be a previously unknown effect of global warming. ;)
Either way, it takes about 44 normal sized Campfire Marshmallows to equal 10 oz. This means that if you used 40 Marshmallows, you would only have 9.09 oz. Oh, and the miniatures...? 4 cups is not 10 oz, it's 10.5 which is fine, cause that is how many I use.
The only thing that was consistent between the recipe on the cereal box, the recipe on the marshmallow package and the one that I have always used was the amount of Rice Krispies themselves.... 6 cups. YAY! I found something we all agree on.
This is the dawning of the Age of Aquarius!!
Rice Krispie Treats
(The way I do it)
 4 oz unsalted Butter - Plus 2 TB more; divided
10.5 oz (298 g) bag of Campfire Miniature Marshmallows (Basically the whole bag)
1/4 tsp Kosher Salt
6 Cups (5.5 oz) (162 g) Rice Krispies or other crisped rice cereal
 First, use 1 TB unsalted Butter to rub down a 12 x 7 inch baking dish.
 Melt the 4 TB butter in a large saucepan over medium flame. (about 3 minutes unless at room temp)
 Add the Mini-Marshmallows and stir constantly until melted. (about 2 minutes)
 Stir in Kosher Salt.
 Add Rice Krispies and fold until well coated.
 Dump the mixture into the prepared baking dish and grease your hands up with the remaining TB of butter and press the mixture evenly into the dish.
 Let sit at least 20 minutes to cool and harden.
 Cut into 2 inch pieces. (with a pizza cutter)
 Then just TRY to not sit and eat the whole pan by yourself. I have a hard time resisting the Sweet buttery salty crunch. Mmmmmmm Truly a comfort food for me, from my earliest childhood memories.....
Harmony and understanding
Sympathy and trust abounding
No more falsehoods or derisions
Golden living dreams of visions
Mystic crystal revelation
And the mind's true liberation --- Aquarius...... Aquarius....
Mangia!!
~~


