I love homemade bread. Love it!
I just don't normally make it due to the amount of time it takes. Let's face it, when one is producing bread, one must be in the general vicinity of the dough for the duration. You mix up a Starter, Mother, Biga or Poolish then that must "ferment". Then you mix up the actual dough and add the Starter, Mother, Biga or Poolish... and that must rise, then you form loaves and THAT must rise... Then you have to bake it. Time - Time - Time - Time - Time. (did I mention it takes time?)
On the flip side, there are those easy breads such as Foccacia and Pizza dough. I make those all the time due to their hands off approach. You simply activate the yeast in warm water, then simply mix up the dough and toss it in the refrigerator for 8 hours to do it's thing. Totally hands off, until you are ready to form the pizza crust or loaves.
While I am thinking about it, I would like to put forth a terminology change. This form of raising dough and/or batter, as in the case of Brussels waffles, in the refrigerator is usually referred to as "slow rising", or worse, "retarding the rise". And while I do enjoy the extra flavor this gives to the dough, I don't really care for the first term and I find the second one particularly offensive to be honest. Since I have been brewing beer, which involves yeast as well, I would like to point out that any beer in which the yeast is fermenting (breaking down sugars to produce various organic compounds as well a carbon dioxide) under refrigeration temperatures is called "Lagering" (This is where the term "lager" beer comes from) So I propose that raising dough under refrigeration hence forth be referred to as "Lagering the dough" I just had to put that out there... OK, back to our regularly scheduled Blog post.
Of all the more complicated breads out there, my ultimate favorite is Rye bread... Be it Russian, Dark, Pumpernickle, Jewish, Polish or any of the other million variations they are all just darned yummy.
Working with Rye is particularly tricky though, because of the grain's makeup. First off, Rye is low in gluten, which is what really holds bread together and allows it to contain the carbon dioxide thus allowing it to rise. The second issue is the particular enzymes in the grain which differ from those of wheat.
Warning.... I am about to geek out..... ;)
There are two basic forms of grain starches.... Amylose and Amylopectin. You may remember these from my risotto posts. Shorter grained "risotto rice" such as Arborio & Carnaroli contain higher quantities of Amylopectin which is responsible for the creamy deliciousness that is Risotto. OK. Well, all grains have these two starches in different ratios, whether Rice, Wheat, Rye, Triticale or Barley. Because Rye is lower in gluten (which is a protein, not a starch) the structure of the Rye bread is more dependent on the Amylose starch than on Gluten protein.
Enter the nasty bad evil amylase. (at least as far as bread is concerned, for beer its a good thing)
Amylase is an enzyme that breaks down a plants starch reserves, similar to the way your body uses lipase to breaks down fat. (remember, plants store food a starches not fats) This enzyme is alive and active in Rye flour as well as Wheat flour. However, the amylase in wheat is more susceptible to heat and becomes inactive, while the Rye amylase is unaffected and continues breaking down starches during the baking process. So while you are depending on starches gelling properly for your Rye bread structure the evil amylase is tearing it down and releasing your carbon dioxide, making your bread flat. This is not as big of a deal with Wheat bread, as you have plenty of gluten for support. But as I said, Rye is low in gluten and what little gluten it DOES have is very weak.
Luckily, there is a solution. Acid. For while heat has very little effect on the Amylase in Rye, acid stops it dead in it's tracks.
THUS, most Rye bread starts out as a sourdough containing lactic acid, courtesy of the lactobacillus bacteria that are living symbiotically with the yeast (saccharomyces). But, you can "cheat". Hee hee hee hee. Buttermilk is an excellent way of acidifying your Rye dough and saving you a weeks worth of cultivating a Sourdough starter. What could be better? It adds richness to the dough, cause it's milk, and acidifies at the same time, thanks to the lactobacillus bulgaris. AWESOME!!!!
So here is my cheaters Buttermilk Rye bread...
 2 1/4 cups (18 oz) (532 ml) Buttermilk (I prefer Bulgarian because it's more sour)
1/4 cup (2 oz) (60 ml) Water
2 TB Unsalted Butter
1 TB Sugar
1 TB Molasses
1 tsp Kosher Salt
1 package (1/4 oz) (7 g) Active Dry Yeast
4 cups (16 oz) (452 g) Rye flour
2 1/2 cups (13 1/2 oz) (382 g) Bread flour
2 TB Caraway seeds
1 beaten egg white for egg wash
Heat the Buttermilk to 120 degrees....
 Remove from the heat and add Butter Molasses, Sugar and Salt, then stir until the butter is completely melted.
 Sprinkle the yeast over the top of the somewhat cooled mixture.
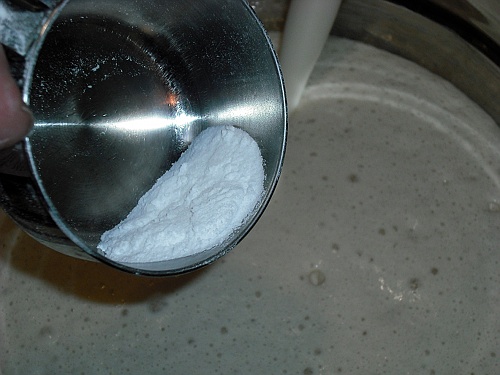
 Pour into the work bowl of your mixer that has been fitted with the paddle attachment, then sprinkle 3 cups (12 oz) (340 g) of the Rye Flour over the buttermilk mixture.
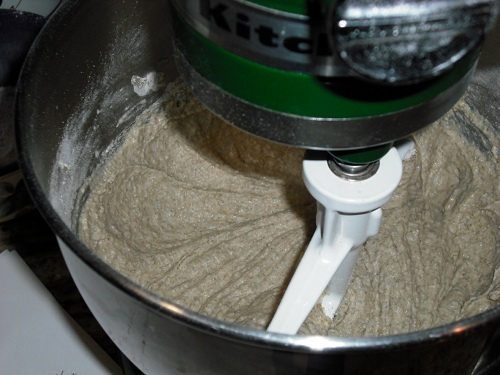
 Beat until thoroughly combined.
 Add the remaining 1 cup (4 oz) (112 g) of Rye flour and continue beating until combined.
 Quickly oil a large bowl with either Olive oil or Vegetable oil.
 Scrape the Rye "paste" from the mixing bowl and into the oiled bowl.
 Cover and set in a warm place to rise, until doubled in volume (about 1 hour)
 Clean your mixer bowl and fit the mixer with the dough hook.
 When doubled in size, remove the Rye "paste" from it's place of raising and scoop it back into the mixing bowl.

 Begin "kneading" with the dough hook while slowly adding 2 cups (11 oz) (312 g) of the bread flour and the 2 TB of Caraway Seeds.

 Once it has been incorporated, turn the dough out onto a surface that has been floured with the remaining 1/2 cup (2 1/2 oz) (70 g) of bread flour.
 Knead by hand until it has been incorporated as well. (you can technically do this with the mixer, but I like to get my hands in the dough to make sure it feels right)
 Divide the dough in 2 pieces of about 1 lb 10 oz (26 oz) (737 g) each.
 Form into either rounds or longs and place on a parchment lined baking sheet.
 Cover again, with a towel this time, to allow for vapor loss, and let rise for 1 hour.
 When there's about 15 minutes left for the rise go ahead and begin preheating the oven to 350 F (175 C) degrees.
 When the loaves have finished rising, make 3 slices in the top of each loaf, then brush the tops with beaten egg white.

 Place in the oven and bake for 50 minutes.
 Turn loaves out onto a cooling rack, and let cool. (I know it's hard, not to cut into it right away, but you need to let the gelled starches set completely after baking)
 Once cooled, slice a big hunk and enjoy.
 Can't eat 2 whole loaves before they go stale? That's alright, you can slice one up, place it in a freezer bag and store in the freezer for up to 3 months.
 Mangia!!
~~
I just don't normally make it due to the amount of time it takes. Let's face it, when one is producing bread, one must be in the general vicinity of the dough for the duration. You mix up a Starter, Mother, Biga or Poolish then that must "ferment". Then you mix up the actual dough and add the Starter, Mother, Biga or Poolish... and that must rise, then you form loaves and THAT must rise... Then you have to bake it. Time - Time - Time - Time - Time. (did I mention it takes time?)
On the flip side, there are those easy breads such as Foccacia and Pizza dough. I make those all the time due to their hands off approach. You simply activate the yeast in warm water, then simply mix up the dough and toss it in the refrigerator for 8 hours to do it's thing. Totally hands off, until you are ready to form the pizza crust or loaves.
While I am thinking about it, I would like to put forth a terminology change. This form of raising dough and/or batter, as in the case of Brussels waffles, in the refrigerator is usually referred to as "slow rising", or worse, "retarding the rise". And while I do enjoy the extra flavor this gives to the dough, I don't really care for the first term and I find the second one particularly offensive to be honest. Since I have been brewing beer, which involves yeast as well, I would like to point out that any beer in which the yeast is fermenting (breaking down sugars to produce various organic compounds as well a carbon dioxide) under refrigeration temperatures is called "Lagering" (This is where the term "lager" beer comes from) So I propose that raising dough under refrigeration hence forth be referred to as "Lagering the dough" I just had to put that out there... OK, back to our regularly scheduled Blog post.
Of all the more complicated breads out there, my ultimate favorite is Rye bread... Be it Russian, Dark, Pumpernickle, Jewish, Polish or any of the other million variations they are all just darned yummy.
Working with Rye is particularly tricky though, because of the grain's makeup. First off, Rye is low in gluten, which is what really holds bread together and allows it to contain the carbon dioxide thus allowing it to rise. The second issue is the particular enzymes in the grain which differ from those of wheat.
Warning.... I am about to geek out..... ;)
There are two basic forms of grain starches.... Amylose and Amylopectin. You may remember these from my risotto posts. Shorter grained "risotto rice" such as Arborio & Carnaroli contain higher quantities of Amylopectin which is responsible for the creamy deliciousness that is Risotto. OK. Well, all grains have these two starches in different ratios, whether Rice, Wheat, Rye, Triticale or Barley. Because Rye is lower in gluten (which is a protein, not a starch) the structure of the Rye bread is more dependent on the Amylose starch than on Gluten protein.
Enter the nasty bad evil amylase. (at least as far as bread is concerned, for beer its a good thing)
Amylase is an enzyme that breaks down a plants starch reserves, similar to the way your body uses lipase to breaks down fat. (remember, plants store food a starches not fats) This enzyme is alive and active in Rye flour as well as Wheat flour. However, the amylase in wheat is more susceptible to heat and becomes inactive, while the Rye amylase is unaffected and continues breaking down starches during the baking process. So while you are depending on starches gelling properly for your Rye bread structure the evil amylase is tearing it down and releasing your carbon dioxide, making your bread flat. This is not as big of a deal with Wheat bread, as you have plenty of gluten for support. But as I said, Rye is low in gluten and what little gluten it DOES have is very weak.
Luckily, there is a solution. Acid. For while heat has very little effect on the Amylase in Rye, acid stops it dead in it's tracks.
THUS, most Rye bread starts out as a sourdough containing lactic acid, courtesy of the lactobacillus bacteria that are living symbiotically with the yeast (saccharomyces). But, you can "cheat". Hee hee hee hee. Buttermilk is an excellent way of acidifying your Rye dough and saving you a weeks worth of cultivating a Sourdough starter. What could be better? It adds richness to the dough, cause it's milk, and acidifies at the same time, thanks to the lactobacillus bulgaris. AWESOME!!!!
So here is my cheaters Buttermilk Rye bread...
Polish Buttermilk Rye Bread

1/4 cup (2 oz) (60 ml) Water
2 TB Unsalted Butter
1 TB Sugar
1 TB Molasses
1 tsp Kosher Salt
1 package (1/4 oz) (7 g) Active Dry Yeast
4 cups (16 oz) (452 g) Rye flour
2 1/2 cups (13 1/2 oz) (382 g) Bread flour
2 TB Caraway seeds
1 beaten egg white for egg wash
Heat the Buttermilk to 120 degrees....




~~